Tutorial #1 (Getting Started)
A quick overview on how to get started using Ribalta after signing up for an account.

The Ribalta desktop app was designed with the main intention of running events that utilize a Media Wall Display. Even though you can also use the Ribalta desktop app to setup and run events that don't use media wall displays, Most people find it easier to do that from the Ribalta Mobile app.
With the Ribalta Desktop app, you can design and customize your event. You can drag and drop in custom Billboard images, background images and even change the highlight colors. You can completely customize your the look of your event Media Wall allowing it to match perfectly with your event.
It is essential to understand the work flow of the Ribalta desktop app so that you can set up Ribalta to best fit your needs. Ribalta is made up of two apps: the main Ribalta app and the display app. The main app contains all the controls that you use to set up and manipulate Ribalta. It is designed to stay on your main computer display so that you can see and control Ribalta. In the main app, you can create and edit multiple different event profiles to match the specific events that you use Ribalta at. You can also set view modes, filter messages, start and stop events, and more. During your event, you would also use the main app to approve messages for viewing in both the event gallery and the display app media wall. You can see an example of the display app Media wall in action in the video below.
See the Ribalta display in action...
The display app outputs your events Media Wall, so that your audience can see and interact. The display app is designed to be displayed on your computer's second screen, other wise known as your extended desktop. In this case your second screen is the TV or projector that is connected to your computer. By design, this TV or projector should be set up facing your audience. During your event the display app will show approved pictures and messages to the screen as well as any advertisements or custom images that you have added for viewing at your event. The display app also shows a QR code with instructions for your audience to post pictures and messages to the screen.
The Getting Started documentation will help you learn enough to get going using Ribalta, and the video above gives a short tutorial. This help documentation provides detailed instructions on how to operate every component in Ribalta. But before you get started, it is important for you to know what a event profile is.
A Ribalta event profile is a visual scheme that can be personalized for each individual event. The event profile contains the name of the event, settings for the event, and pre-loaded media content that will be shown during the event. You can add pictures/video content to each event profile. It can be entertainment, advertisements or informational content. This content will be displayed periodically throughout an event. You can make as many different event profile as you want. You can duplicate, edit and delete event profile as well as refine and customize them as you desire.
A Ribalta event is a period of time when Ribalta is actively displaying pictures at your event. It is the period of time when you your guest can interact with Ribalta, by taking and sending pictures that will appear in your Gallery & Media Wall. When you arrive at your venue, you will select an event profile and click Play to start your event. When your event is over, you will click Stop to end the event. Ribalta automatically logs all events in your event history, with the date and start time. Ribalta automatically saves all the pictures that you received during that event into the Ribalta gallery. The Gallery is viewable during and after the event. The gallery can also be shared by anyone who has the event specific QR code or event link. This is useful especially in the case of a private event such as a wedding. While the bride and groom wait weeks for professional pictures, you can deliver them instant gratification from their special day. It also gives them the ability to share pictures with all their family and friends, including the people who couldn't attend.
There are endless ways to use and set up Ribalta to fit your needs. Bars, clubs and club DJs can use Ribalta as a fun tool to entertain their patrons and promote their sponsors or drink specials, while mobile DJs can use it as another tool to up-sell at their events. Ribalta is the perfect Live Sharing, Media Wall & Photobooth: All In One App providing your audience with fun as they take pictures and see themselves on the displays as well as in the shared gallery at your event.
Let's get started.
Mac OS users will see the following message box appear when launching the Ribalta Display for the first time.
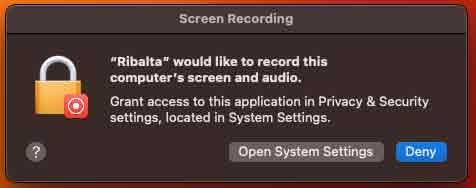
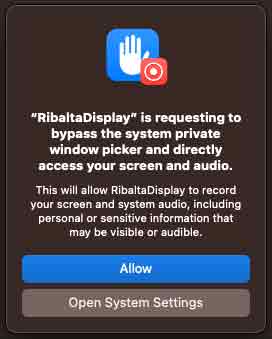
This is because Ribalta needs screen information to detect motion on the screen. We do not store any information from your screen in Ribalta or on our servers. In order to use detection mode in Ribalta, you will need to grant access. To do this, click on the Open System Preferences button. You will see a second pop-up asking you to allow this setting. Click allow. Ribalta should work correctly now.
You can also select this setting by going to Privacy & Security and scrolling to screen & system audio recording in the your Mac OS System Preferences as shown below.
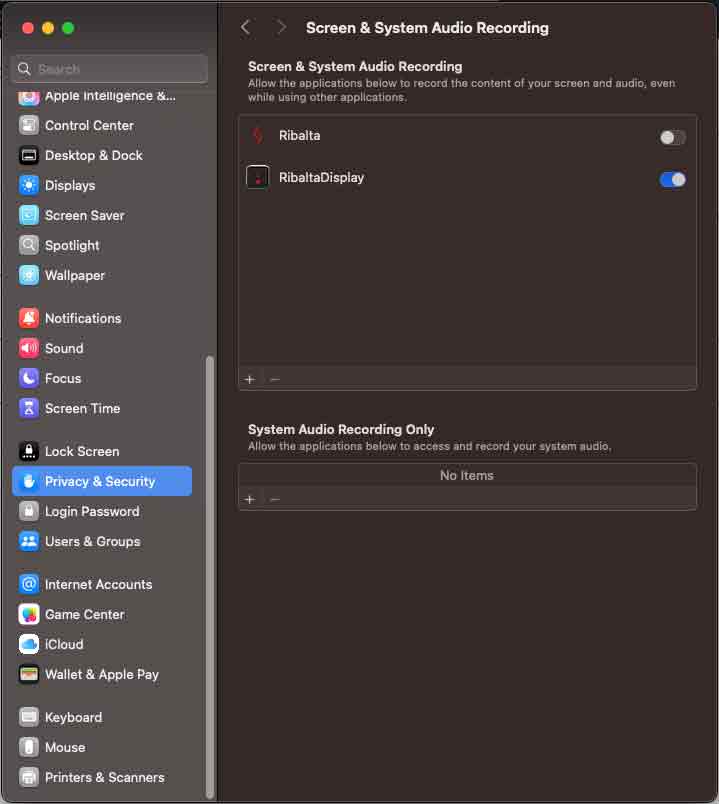
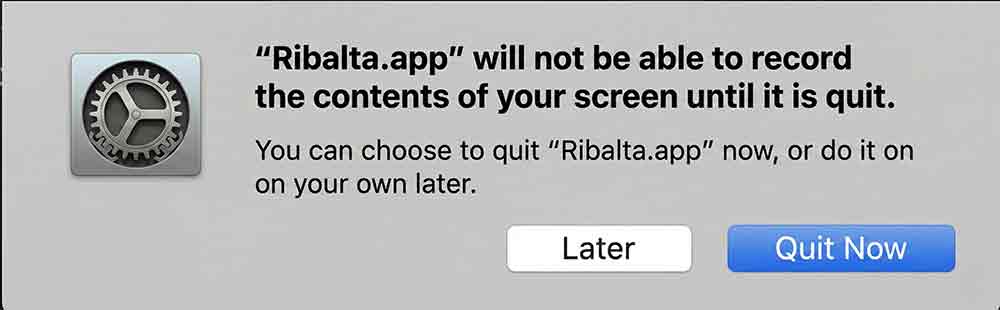
Find the RibaltaDisplay app in the list and make sure you enable it. Once you do that, you will get a prompt to quit Ribalta. Click Quit Now if you are ready to quit out of Ribalta. Ribalta needs to restart in order for the permission to take effect.
That's it! Now you can use detection mode with no issues.
To better understand why macOS is asking for permission to “record your screen”...
In order for any software to function, it has to temporarily store data into memory. So if an app wants to view the screen of your computer, the app also has to temporarily store this data into memory. macOS considers the storing of any data from your screen as “recording the screen”, even if the software is only temporarily storing this data to perform a function, then clearing the data. That is exactly what is happening with Ribalta Video Detection. Ribalta views the screen to determine if a video is playing or not, then it clears the data. Ribalta does NOT save or store any data, pictures or video from your screen locally on your hard drive or on our Ribalta servers.
To reset your password, simple go to My Account and hit Forgot password link. Follow the instructions to reset your password.
Ribalta runs on both macOS and Windows. Choose the platform you want. Use the DJ software you want, or no DJ software at all. Ribalta will integrate seamlessly into YOUR existing setup.
Minimum Requirements: Windows 10 or macOS Mojave (Intel & Silicon); Internet connection; Connection to second display for output
Recommended Hardware: Intel i5/i7, 8GB RAM, 5GB free disk space, and Intel HD 4000 or better GPU
We recommend first trying Ribalta in a setting that is not a live event so you get to know exactly how all the features work. Ribalta uses two displays: your primary computer display and a secondary screen, which will display the content that your audience sees. Although your second display is not required to launch or set up Ribalta, we recommend having a second display connected in order to test and fully understand how Ribalta works.
For best testing practice, connect your second monitor or TV to your display output on your computer. This connection is normally HDMI, VGA, DVI, Display Port, Mini HDMI, Micro HDMI or Mini Display Port. Check your computer and display manuals or contact the manufacturer to find out whether the devices are compatible and what cables you will need to connect your devices. If you do not have your second display screen at this time, you can still continue to the next step.
For best results, we recommend running your display at 1080p resolution (1920x1080). The Ribalta display is designed specifically for 1080p. However, Ribalta will continue to run at lower and higher resolutions. Ribalta will always display the media wall at a 16:9 aspect ratio screens.
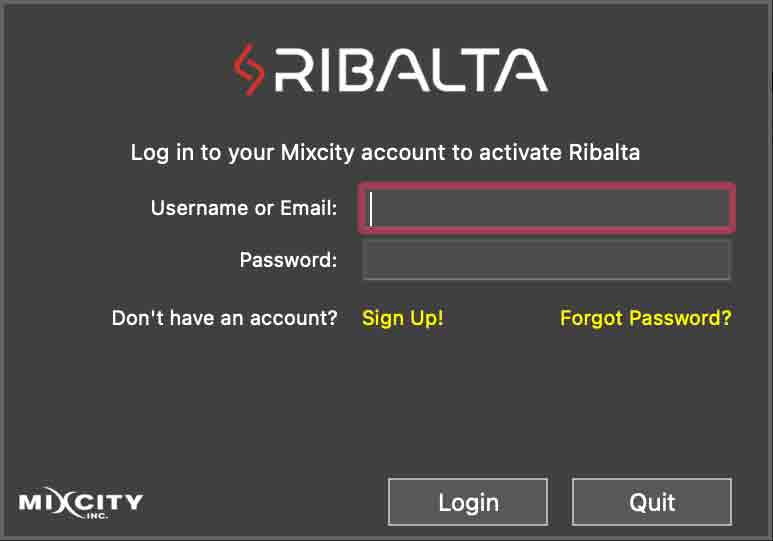
Launch Ribalta. You will be prompted to log into your account. Use the same username and password that you setup when you signed up for Ribalta. After downloading your account data, you will be directed to the main Ribalta application.
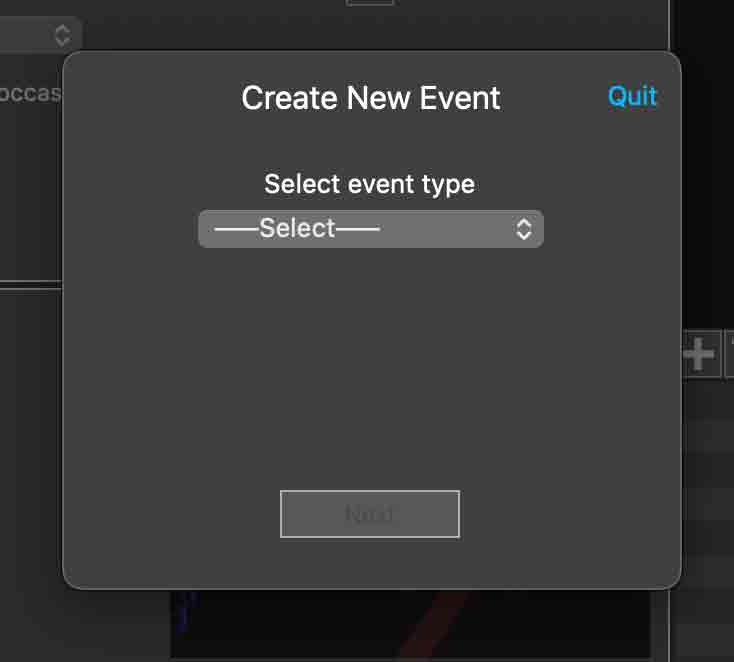
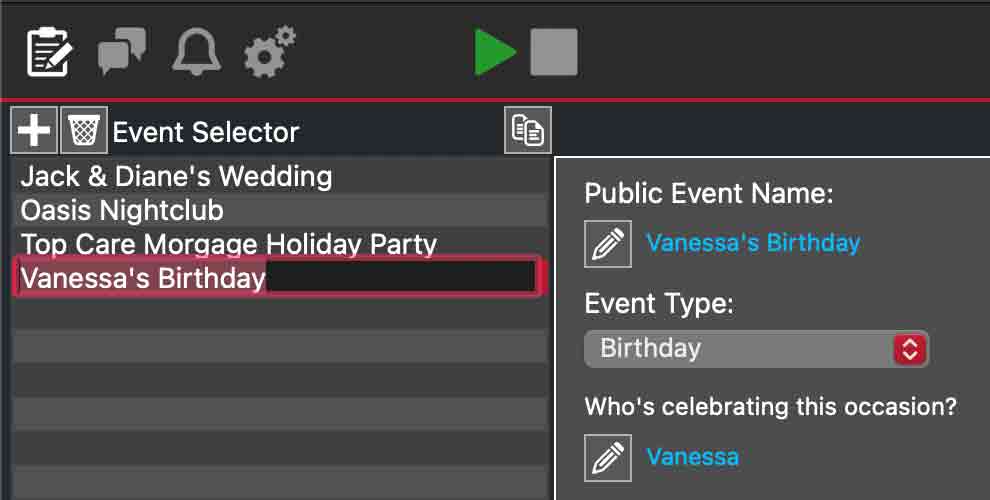
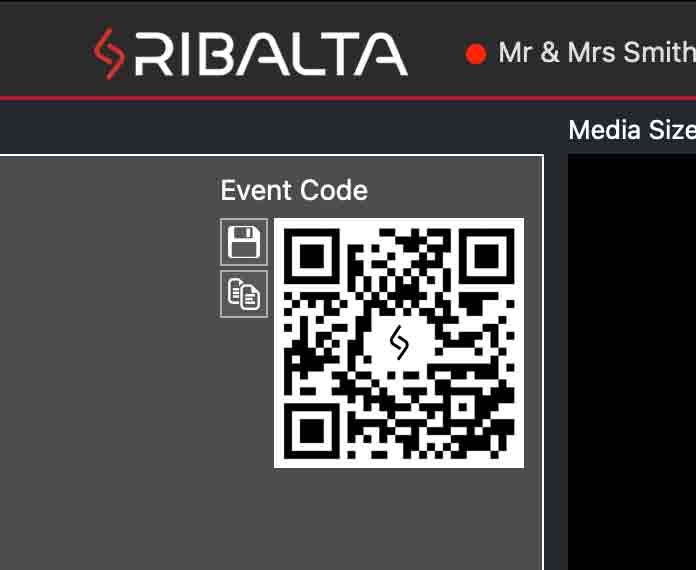
The first screen you see after all your account data is downloaded is your Event Profile page. You will be instructed to create a new Event Profile. All Event Profiles have a QR code that is unique to that Event Profile. To get started, select the Ribalta Event Profile you created and hit start.
Please note that you can create, duplicate, edit and delete Event Profile as you need. By creating additional Event Profiles, you can customize Ribalta for each event. Each Event Profile that you create will have its own unique QR code. See the operating instructions later for more on how to setup, use and customize Ribalta.
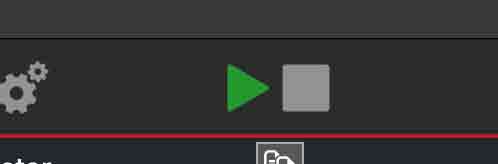
Press the green play button at the top of Ribalta to start your event.
The display app will automatically launch. The display app is the second window that shows what your audience will see. Drag the display app to your second screen and double click it to make it go into full screen mode. You should now see Ribalta working on your second screen (the screen that is facing your guests or audience). At this point, you will begin to receive pictures from anyone who scans your event QR code & uses the Ribalta web app to take and send pictures. They can also send Celebration messages or take a mini photoshoot with the pocket Photobooth. Ribalta will always receive incoming pictures & messages as long as you are in an event. Only Pictures received during an event can be shown on the screen. Event photo galleries can be viewed and shared during and after the event.
Ribalta will work seamlessly with most video DJ software, including Serato Video, MixEmergency, and Virtual DJ 8 or newer. Drag your DJ software output to the second screen (the same screen that you dragged the Ribalta display to). To ensure that Ribalta appears on top of your videos, in your DJ software settings, make sure the video software is not set to always on top. For example, in MixEmergency, go to preferences then click the advanced tab. Then check Lower full screen level. In VirtualDJ, go to settings, then options. Make sure Advanced Options is checked, then go to video, and set videoWindowAlwaysOnTop to NO. Serato Video users do not have to change any settings because Serato video does not have an always on top setting. Ribalta will automatically work correctly with Serato Video.
Ribalta has three display modes. Toggle them by using the buttons on the top right of the application.

Note that there are two different view options for banner mode on the settings page. Anchor the banner is on by default. If you turn this option off, your banner will float over the video. See Anchor the banner
Navigate to your media feed by clicking the second tab in the toolbar at the top of the program.
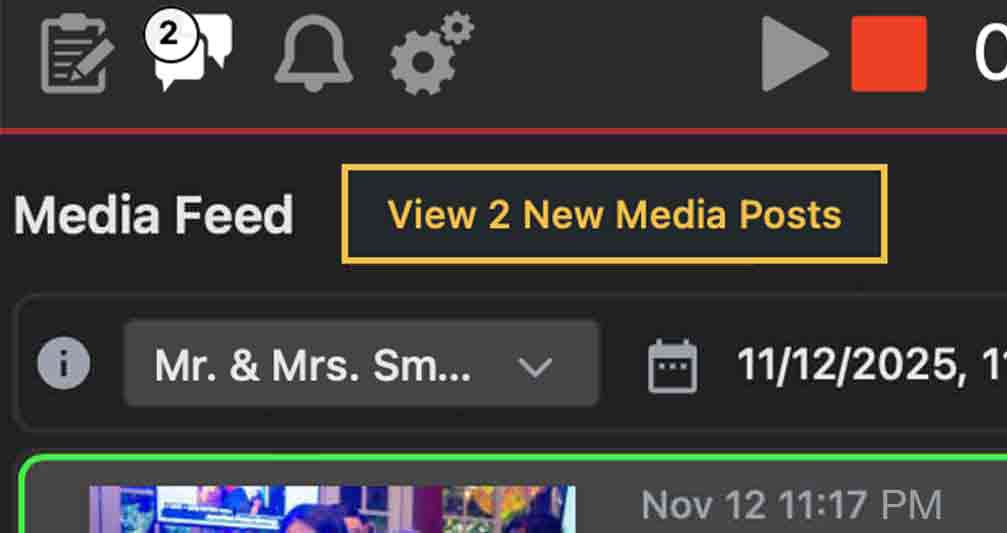
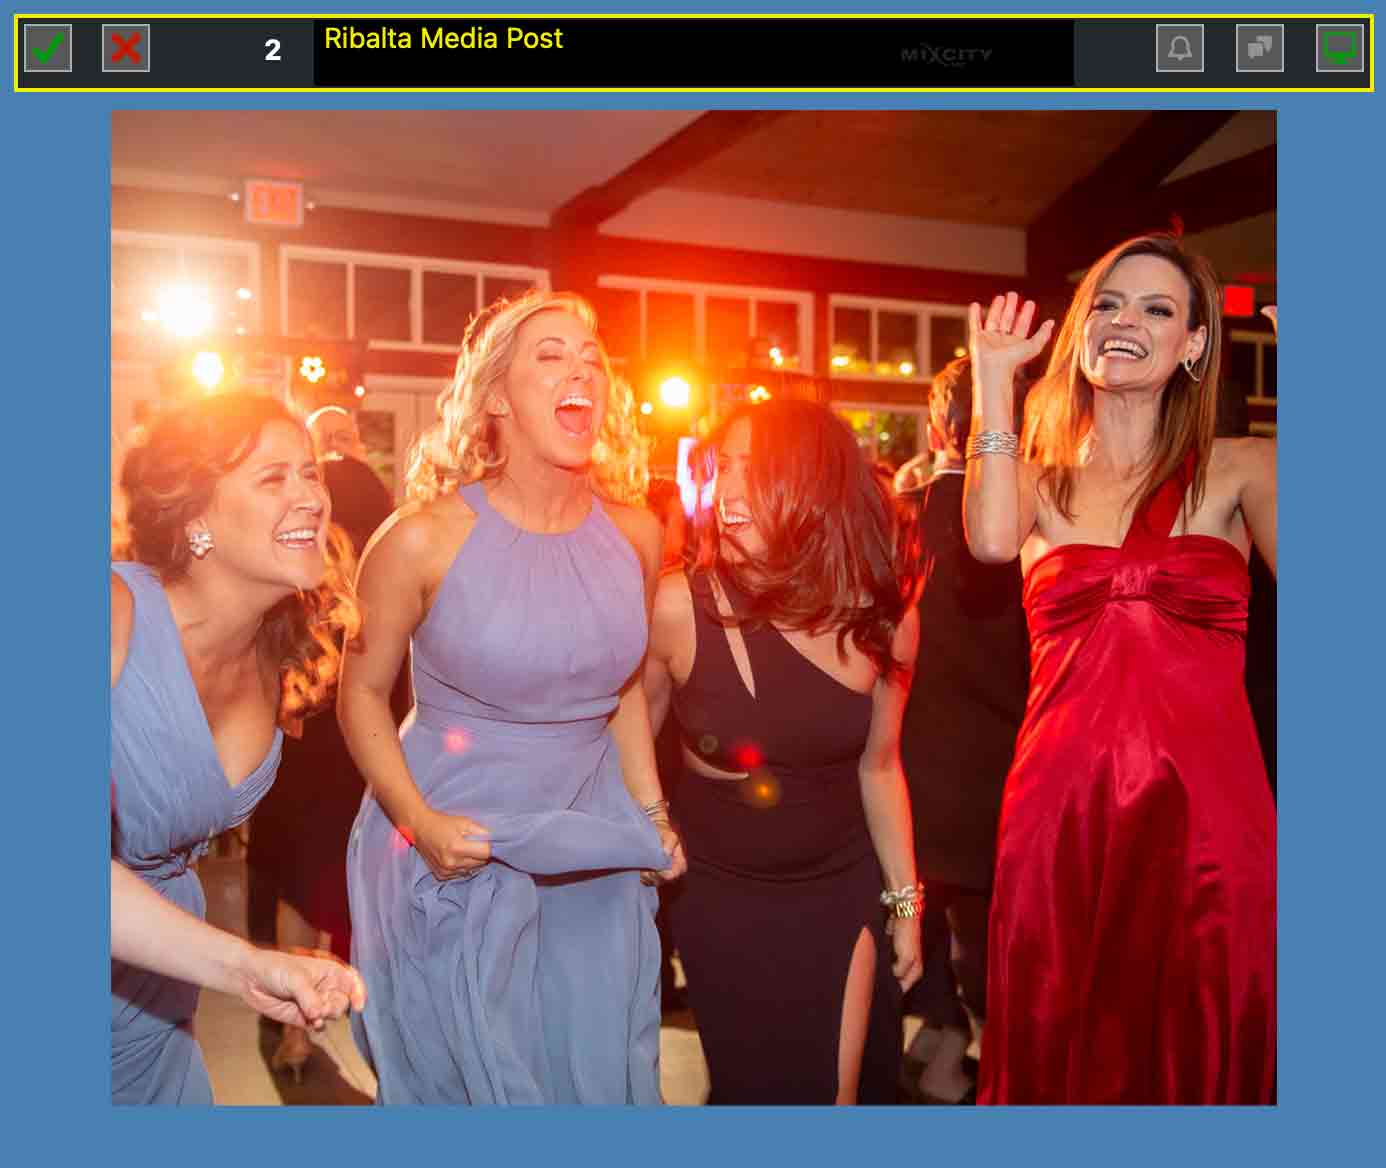
Guest scan the code or click the link you sent them to participate. Once a guest sends in a picture, you will see View new media post appear in yellow in the middle of the screen, letting you know you have a new media post.
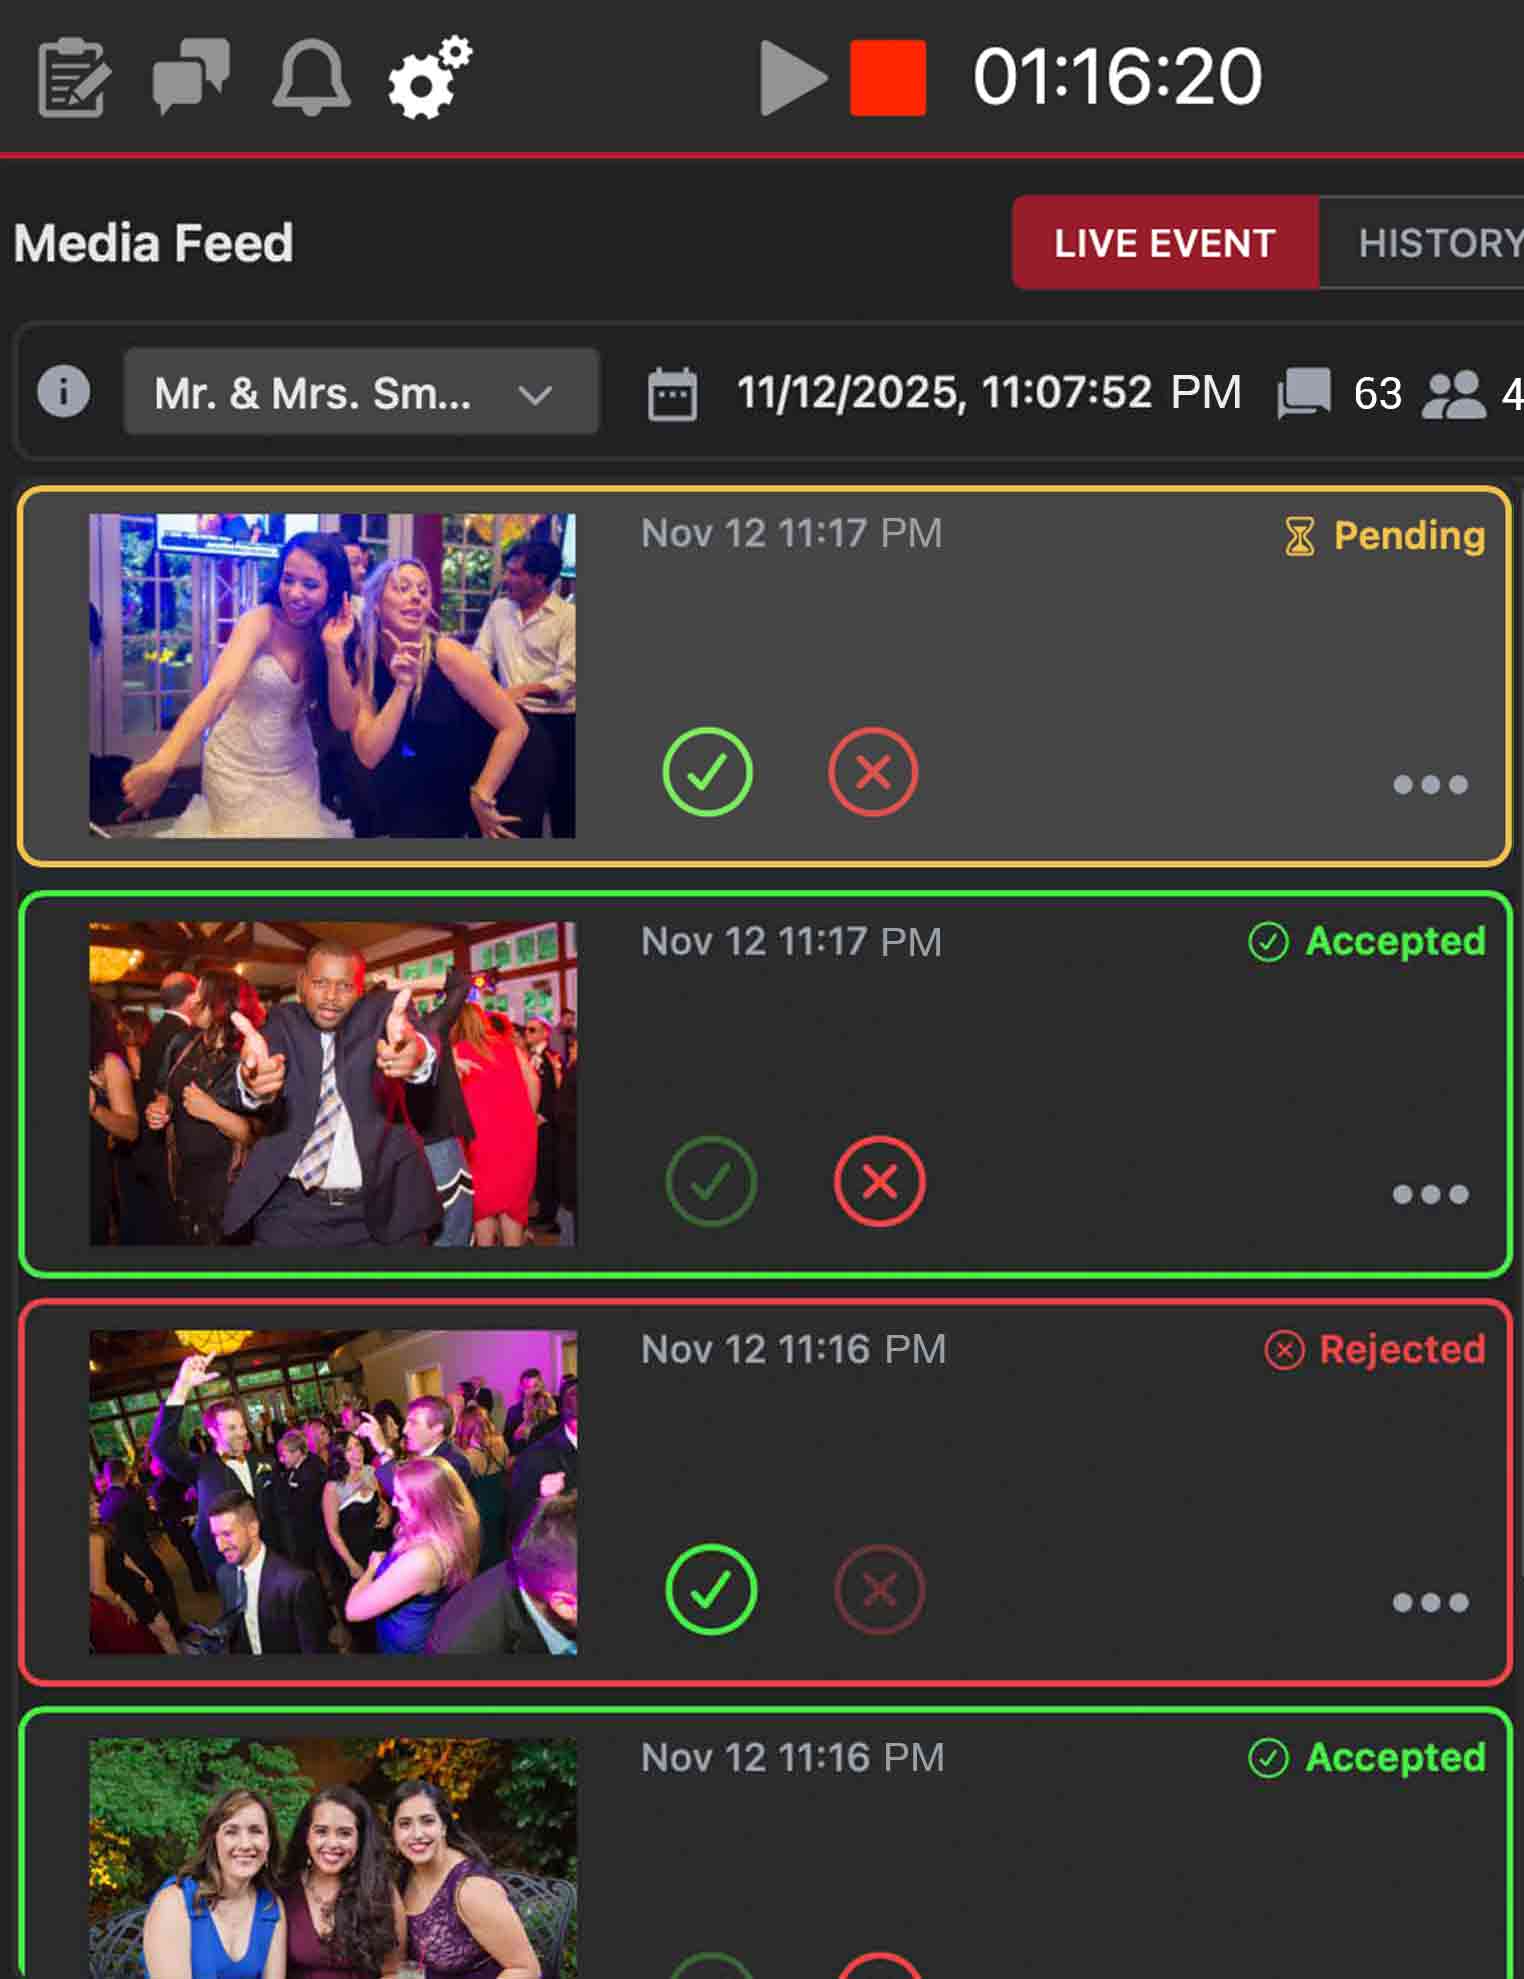
Click on that message to refresh the media feed. Now you will see the latest batch of pictures that have been taken. Use the green check mark to approve the message or the red X to reject it.
Only approved messages will be displayed in the Gallery and on the Media Wall Displays. You also have the option to turn off Manual filter When manual filter is off, all pictures will automatically be viewable in the Gallery and on the Media Wall Displays. Turn on Manual filter if you want to screen images before they are viewable by your guest.
Attention DJs Ribalta provides a more convenient way to approve and reject messages if you are using another software program at the same time, such as Serato DJ or Virtual DJ. Launch the control window by clicking the icon on the top right of the toolbar to turn it green.

You will see a small rectangular box with the Ribalta logo on it pop up.

This control window will remain on top of the screen regardless of what program is in focus. Click on your DJ software program to bring that into focus. The control window should still be visible. We recommend placing the control window at the top of the screen so that it is visible but not obtrusive.

Now send a picture with Ribalta. You should see your picture appear in the control window after a short delay. You can approve or reject media directly within the control window; there is no need to go to the media feed in the Ribalta desktop app. Keep in mind that Ribalta is cloud-based, You can always login to the ribalta mobile app & approve media with the mobile app. Allowing the desktop to display the media wall.
To stop your event, press the stop button on the Ribalta application. The Ribalta display will stop advertising your QR code, however it will continue to display an billboards images that are in your Event profile. Guest will no longer be able to send pictures or celebration messages. Note that your display will continue to run content until you either close the display or close Ribalta.
A Event Profile is a visual scheme that can be personalized for each individual event. The Event Profile contains the name of the event, settings on texting and email, and pre-loaded media content that will be shown during the event. You can add pictures/video content to each Event Profile. It can be entertainment, advertisements or informational content. This content will be displayed periodically throughout an event. You can make as many different Event Profiles as you want. You can duplicate, edit and delete Event Profiles as well to refine and customize them as you desire.
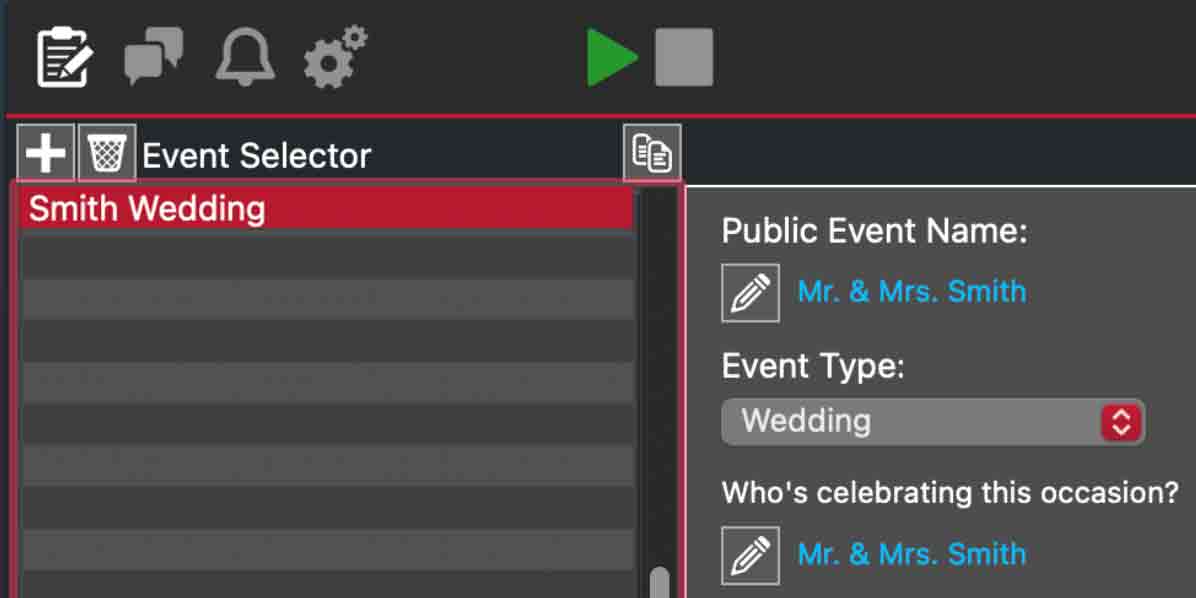
Click the + button above the Event Profile selector section to create a new Event Profile. You can enter a name when creating the Event Profile. Double click on the Event Profile name to rename it. Click the duplicate button to duplicate a Event Profile. To delete a Event Profile, highlight and then click the trash button.
To add media content to a Event Profile, drag and drop the desired pictures and advertisements directly from your computer's hard drive to the Event Media Items list or to the Event preview screen.
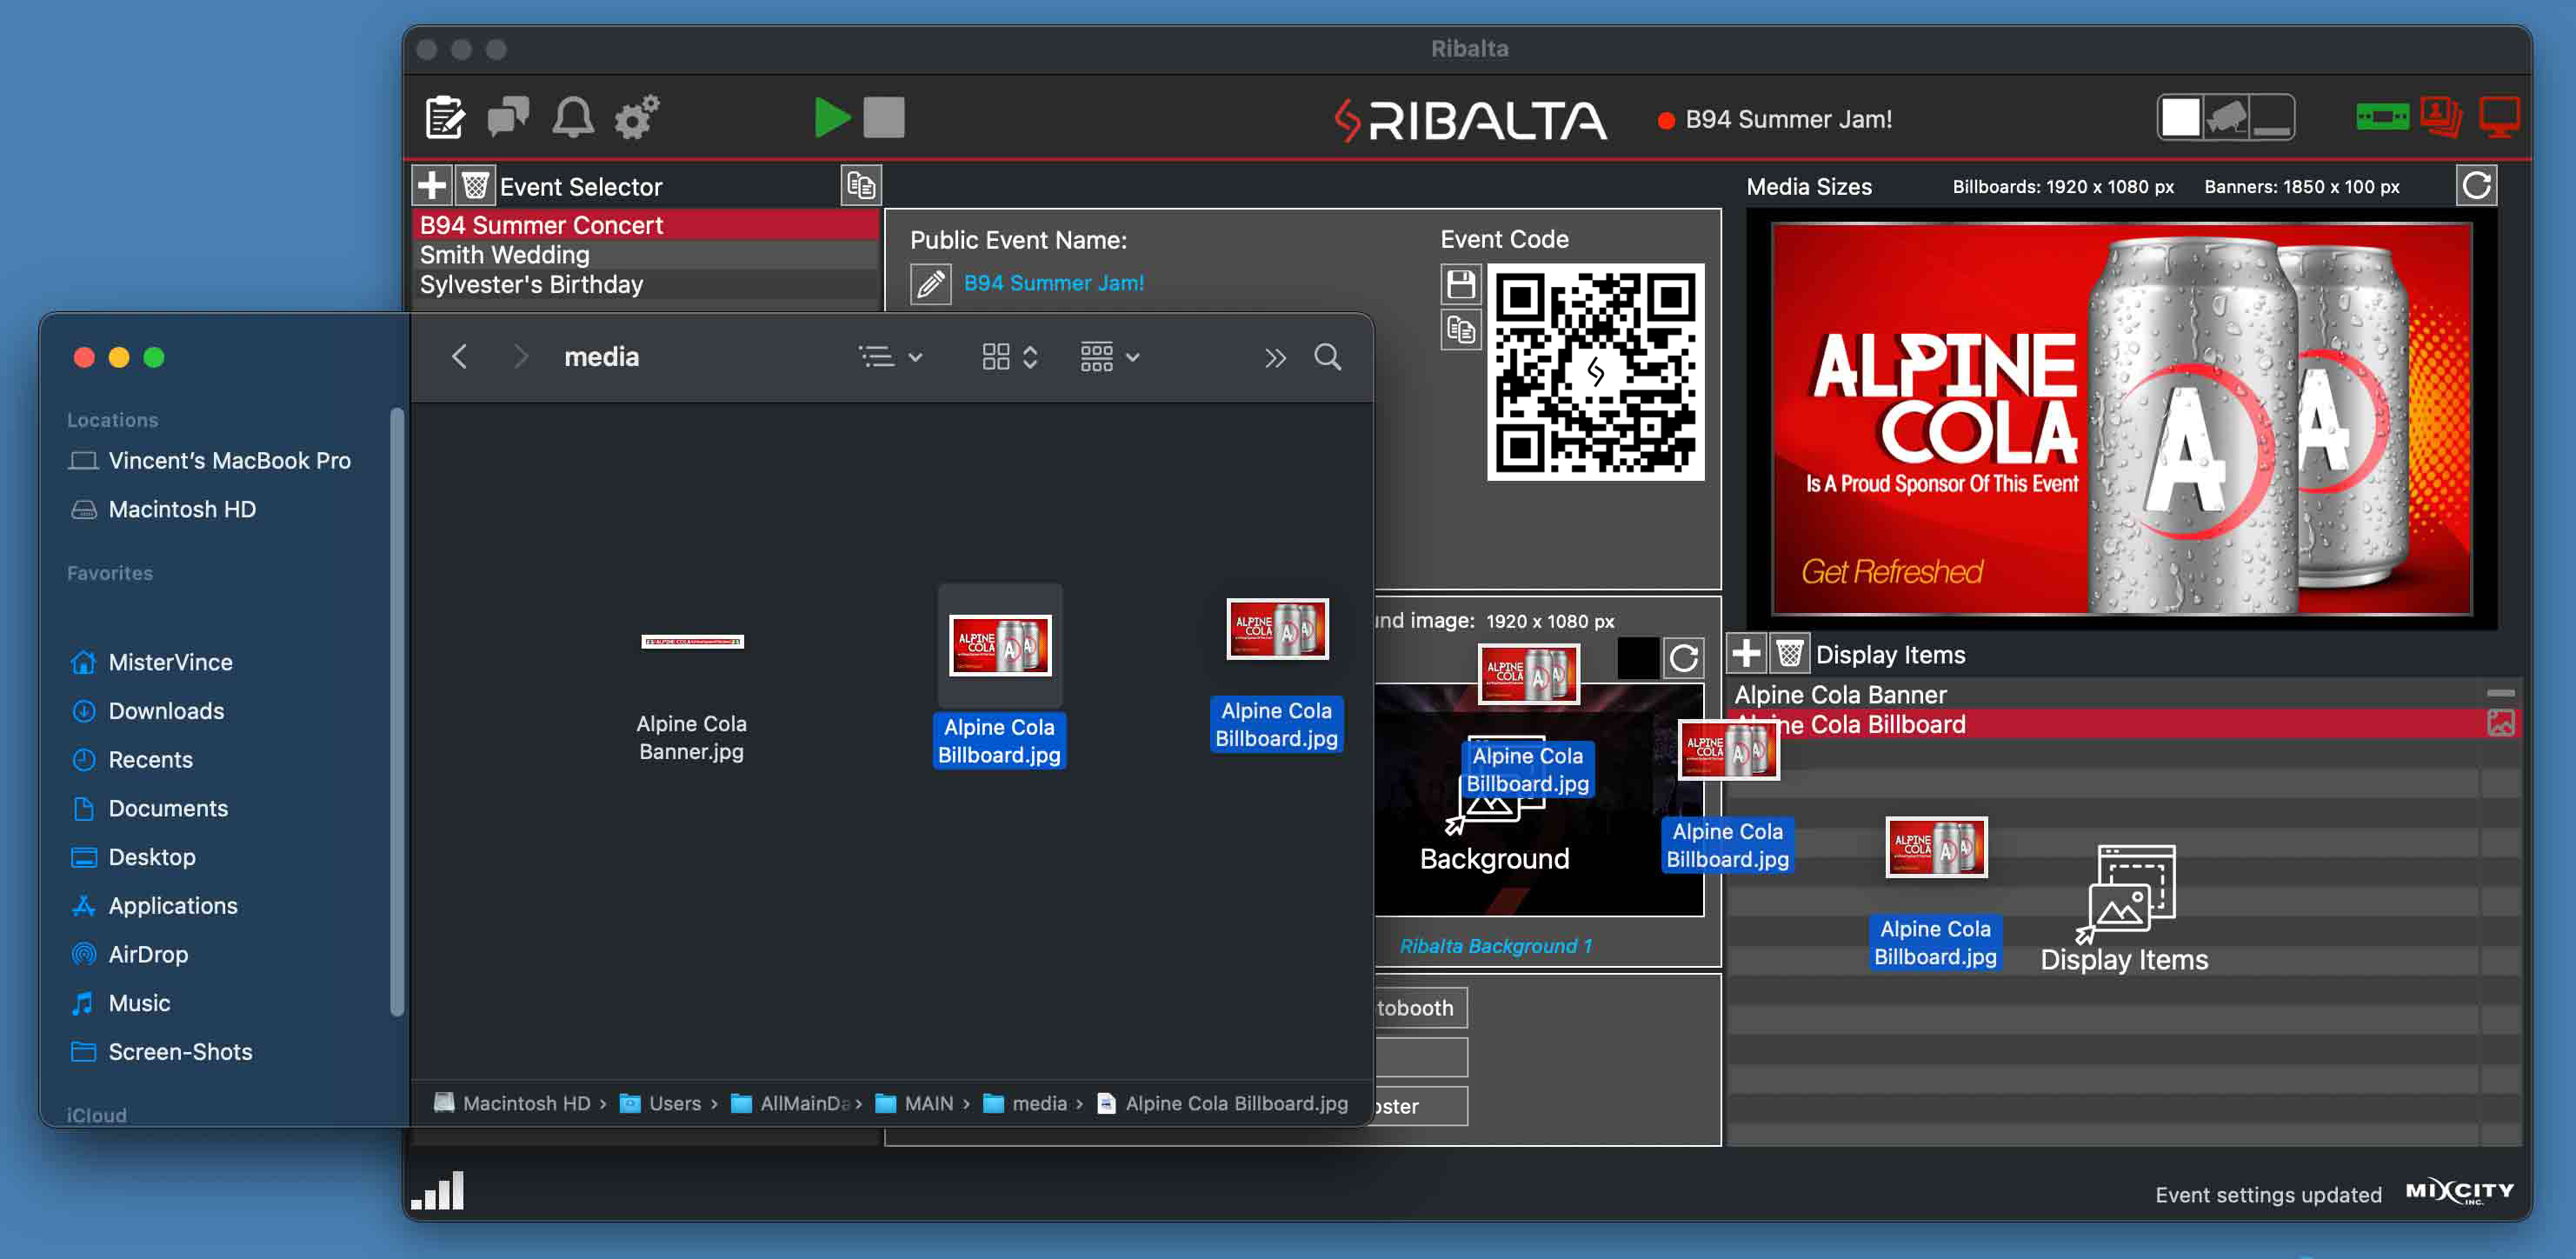
The files you dragged will load directly to the selected Event Profile. Drag the image title up or down in the Event media items list to change the order in which they will display. Items closest to the top will display first. After all items have been shown, Ribalta will restart the rotation with the topmost item. The recommended media size to use for full screen billboards is 1920 by 1080px resolution, but any 16:9 aspect ratio will fill the screen. The recommended media size for overlay banners is 1850 by 100px (the overlay size banner is only necessary if you are using Detection Mode or Banner Mode). Ribalta is smart enough to determine which images are full screen billboards (full Screen size) and which images are the overlay banners. There is no need to specify a banner differently from a billboard. There is also no need to organize them in a different location inside Ribalta. Simply load all your media into the desired Event Profile, and let Ribalta sort it out for you. You can also drag existing media that does not match the recommended size guidelines; Ribalta will do its best to fit these items on the display correctly.
To delete a media item, select the item and click on the trash can icon.
All new Event Profiles are created with default Ribalta images. These are placeholder images. You can remove the default Event media items: click on each item and press the trash icon to remove it. We recommend replacing the defaults with at least two full-screen banners; the Ribalta display is optimized with this in mind. If you are running Detection Mode or Banner Mode, we also recommend that you add two overlay banners. For more information on the display, see the Display section.
Highlight a media item to see a preview of that item above the Event Profile items list. If the item is a video, it will play the video and display a volume slider. Use this slider to adjust the volume level that will be used when this video is played. Slide it all the way to the left to mute the video. If your media item becomes corrupted, you can re-download it from your account. Click the refresh icon above the preview to re-download the media item.
You can also view the media items exactly as they will appear at an event by launching the Ribalta display. You do not need to be in an event to run the display; simply click on the TV monitor icon on the upper right corner of Ribalta to launch the display. While Ribalta is not in an event, the display app will rotate through your Event Profile items in the order you specified.
Note that you can only see the rotation by double clicking the display to make it Full Screen or by putting Ribalta into Full Screen mode
By default, Event media images will show for 8 seconds in full screen mode and 5 seconds in banner mode. If you would like an item to display longer, drag it into the Event Profile more than once back to back. Ribalta will double the amount of time spent on that item. See the Display section for more information.
You can change the background and color scheme, as well as add transparency to the text boxes. These options allow you to customize Ribalta with a background picture of your bride and groom, your logo, or any other image. Match the color scheme of the wedding or holidays such as St Patrick's Day or Halloween
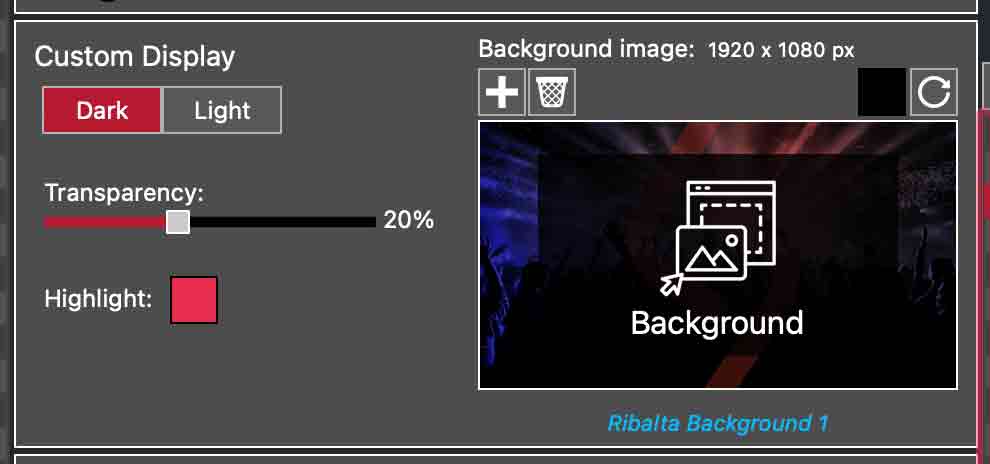
Note: The background image will only show when the Ribalta display is in fullscreen mode. There is no background image in banner mode.
A Ribalta event is a period of time when Ribalta is actively searching for new images from the Internet and showing them in the display. When you first launch Ribalta, there is no event in progress. When you arrive at your venue, select a Event Profile and then click PLAY to start your event. Pressing play does a few things.
When your event is over, click STOP to end the event. Ribalta automatically lists every event with the date and start time on the event history page. The Ribalta display will stop showing pictures and messages. If the Ribalta display app is open, it will only show a rotation of the media items of the selected Event Profile. However your audience will continue to have access to the Gallery via the Ribalta web app, by using the same event QR code. You can goto the Event History page and delete any individual pictures or entire events that you do not wish to keep active for your audience to see. See the Display section for more information on how Ribalta displays messages.
To start an event, select the desired Event Profile and press the green play button at the top of Ribalta.
Once the event has begun, use your mobile device to Scan the QR code thats in your Event Profile. This will allow you to view your event as a guest. From there you can test the event & share the event link. Remember delete any test galleries that you make, so that they are not viewable to the guest when you start the real event.
Note that you must have a working internet connection to begin an event. If you have not already launched the display, it will automatically launch when you press play. Drag the display to your second screen and double click it to make it full screen for your audience to view. Ribalta will remember the last position of your display screen when you quit the display app. So the next time you launch the display it will auto launch on the second screen in full screen. The only time this will not happen is if you have changed your screen configuration. In that case, Ribalta will detect this and launch on the first screen.
At the top of Ribalta you will see the selected Event Profile displayed. You will also see a time count to the right of the play and stop buttons. The counting clock displays how long you have been in your event.

There is no pause button to pause an event. However, if you need to pause showing Ribalta content, you can close the display, then later relaunch it. Click on the TV monitor icon in the upper right corner of Ribalta to toggle the display off. Ribalta will continue running the event, but the output will not be shown to the audience. Click the TV monitor icon again to launch the display when you want to resume the Ribalta event output. The TV monitor icon will be green if the display is running and red if it is closed.
Note that if you stop an event, Ribalta will no longer show the messages and pictures from that event. You should not end an event until you are sure that you no longer want to show the media from that event. You can also close Ribalta without ending your event (for example, if you need to reboot). When you close Ribalta, it will prompt you on whether to end the ongoing event. Press No to keep your Ribalta event open. Ribalta will keep your event running for up to two hours while the app is closed.
To end an event, press the red stop button at the top of Ribalta. Note that the display app will continue displaying your pre-loaded Event Profile items after your event has ended, but it will stop displaying messages and pictures. Remember that you can still view all pictures in the Gallery on the Phone Web app. Use the same event QR code to open the phone app & navigate to Gallery. To close the display, either press the TV monitor icon on the upper right corner of Ribalta, or close the main Ribalta app.
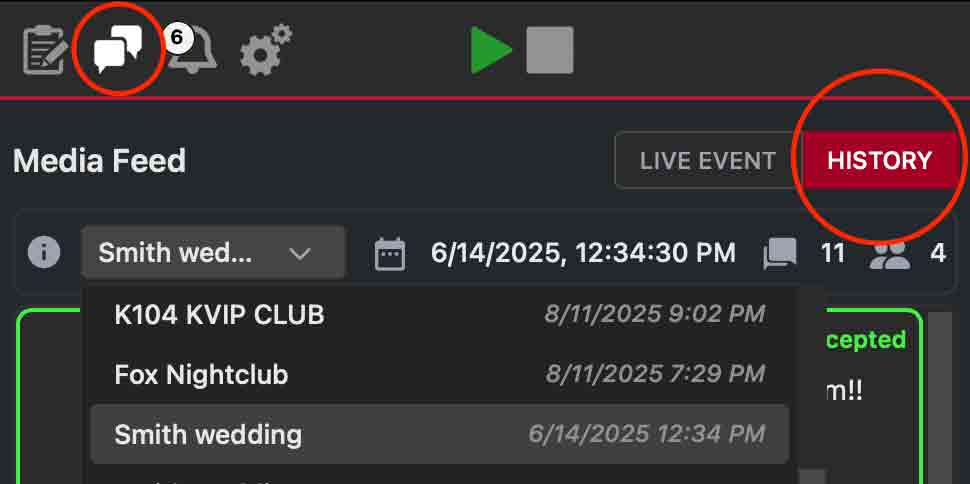
Click on the Media Feed icon in the toolbar, then click History to view the History. Use the pull down menu to select the past event that you want to view. On this page, you can view past events, summary stats on the event, along with pictures from the event. You can export individual pictures from events. You can do this from the Desktop app, from the mobile app or from the Ribalta webapp that your guest use to participate in your event. Anyone with the event link or QR code can share and download the event photos.
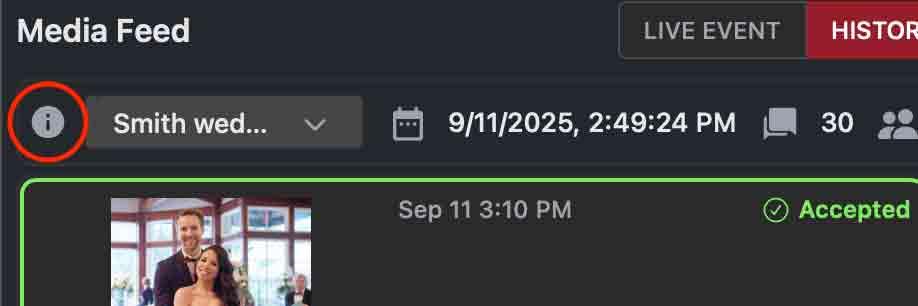
You can delete any event from the History list. Highlight the event you want to delete. Click on the (i) icon and then click delete.
Note: This cannot be undone, so proceed with caution
The media feed is the list of incoming media that you have received. It is also where you approve or reject media to be shown in the gallery and on the Media Wall output screen. As new media are received in Ribalta, you will see a count of how many pending pictures you have that need to be approved or rejected. This count is displayed above the media feed tab icon.

You will also see a button that says View new media post above the feed.
When you click on the View new media button, the new pending media will then appear in your media feed list. Ribalta will automatically select the oldest pending media.
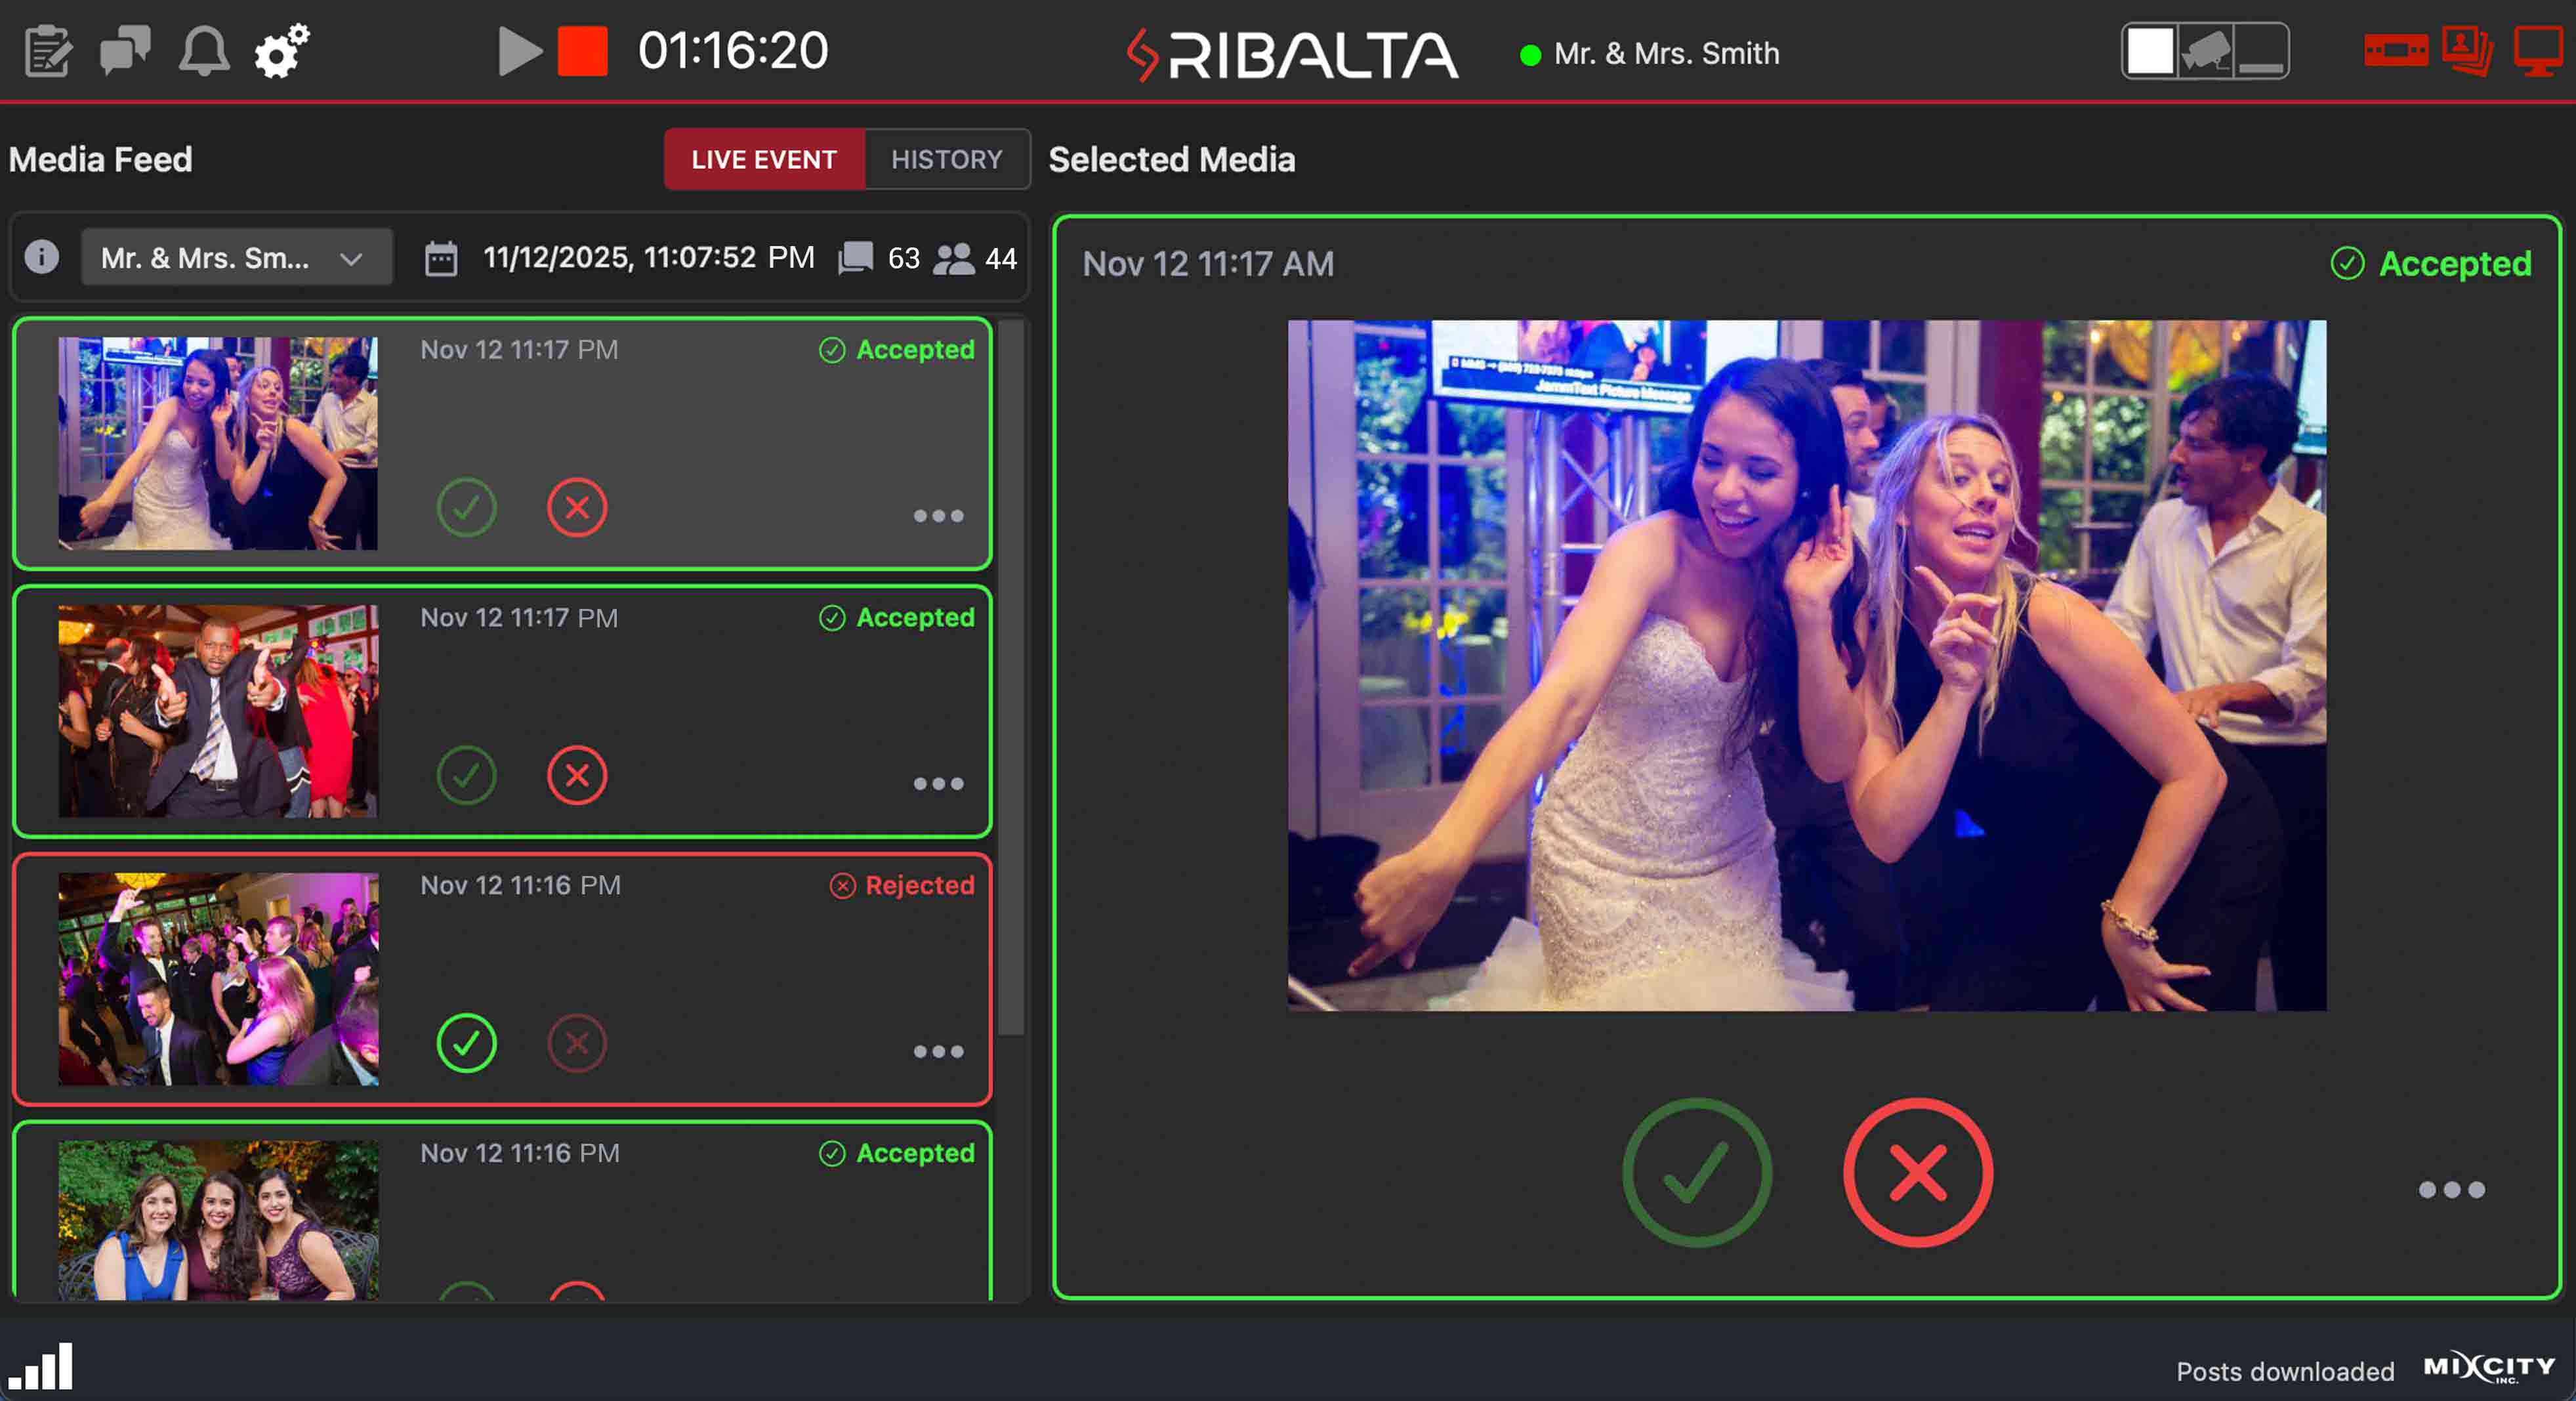
Note that you can click on any picture at any time to highlight the media. The highlighted media will appear larger in the selected media preview box to the right of the media feed. This is to get a close up view of the image if necessary.
Click the green checkmark to approve a images to be viewable in the gallery & on the media wall display screen. The media will turn green indicating that it is now approved for display. Click the red X to reject messages from being seen. The message will turn red, indicating that it will not be viewable in the gallery & on the media wall. You can change the status of a message at any time. If you click approve by accident, simply highlight the message again and click the correct option.
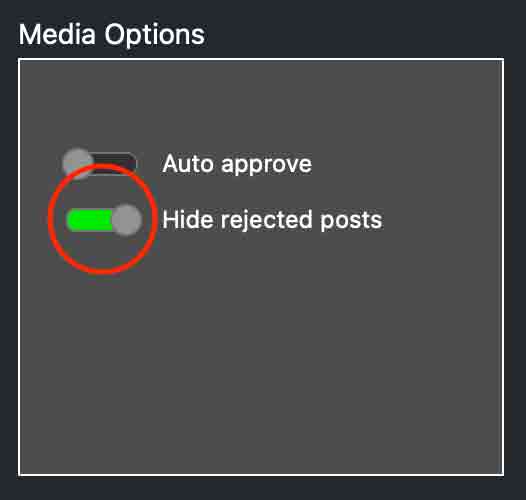
By default, Ribalta will show rejected media in the media feed. If you rejected a picture by mistake, its easy to rectify your mistake. If you do not want to see the rejected messages in the media feed, turn on hide rejected posts on the settings page. To be clear, The media feed is only seen the host of the event. Rejected messages cannot be seen by event guests. Not in the gallery or on a media wall.
The control window is a small window that you can use to approve or reject pictures. This small window will always remain on top of any other app. The control window allows you to to use Ribalta without keeping the main Ribalta app in focus. DJs can keep DJ software in focus while mixing. Meanwhile, the control window allows you to see, approve, and reject pictures.
We recommend placing the control window at the top of the screen so that it is visible but does not obstruct the DJ software program. While you are busy DJing, you can let several pictures stack up in queue. When you have time you can click on the control window and screen the current pending pictures, then continue to DJ. Remember you also have the option to turn off Manual filter. This will automatically send all incoming guest content to the gallery and to the media wall. Manual filter can be found in settings.
To launch or close the control window, click the control window icon on the upper right corner of Ribalta. It is the first of three icons. The icon will appear green if the control window is visible and red if it is not.
The control window works similar to the main Ribalta app's media feed. Use the green checkmark and the red X to approve and reject media. At first the you will see a picture icon.

Click the picture icon to see the image. as soon as the image expands, the picture icon will change to a green checkmark. you can now use the green checkmark and the red X to approve and reject the media.
If a picture-less celebration message is too long to show in the control window, the checkmark icon will turn into ellipses (...).
Aside from approving and rejecting, the control window has several other features.
![]() The bell icon button allows you to see Ribalta notifications. These include important
information about
your account, including usage and payment information.
The bell icon button allows you to see Ribalta notifications. These include important
information about
your account, including usage and payment information.
![]() Click the media feed button to bring the main Ribalta app in focus and go directly to the media
feed.
This is helpful if you want to change the status of a picture. For example, if you accidentally
approved a
picture, click the media feed icon button, then highlight the picture and click the red X.
Click the media feed button to bring the main Ribalta app in focus and go directly to the media
feed.
This is helpful if you want to change the status of a picture. For example, if you accidentally
approved a
picture, click the media feed icon button, then highlight the picture and click the red X.
The status of any picture can be changed at anytime during your event.
Please note that all pictures that you approve will display on the screen in order after you approve them. For example, if you have 8 pending pictures and approve all 8 pictures at once, Ribalta will add them to a queue and display them in the order in which they were received, mixing in advertisements and audience instructions. There is no need to pace yourself in approving pictures. Filter several pictures at once when you have time, and Ribalta will handle the rest.
![]() The last button on the right is the shortcut to Toggle the display on/off.
The last button on the right is the shortcut to Toggle the display on/off.
You can Export or delete any media from the Media Feed. Highlight the media you want to export or delete and hit the options menu it looks like 3 dots. then select export or delete.
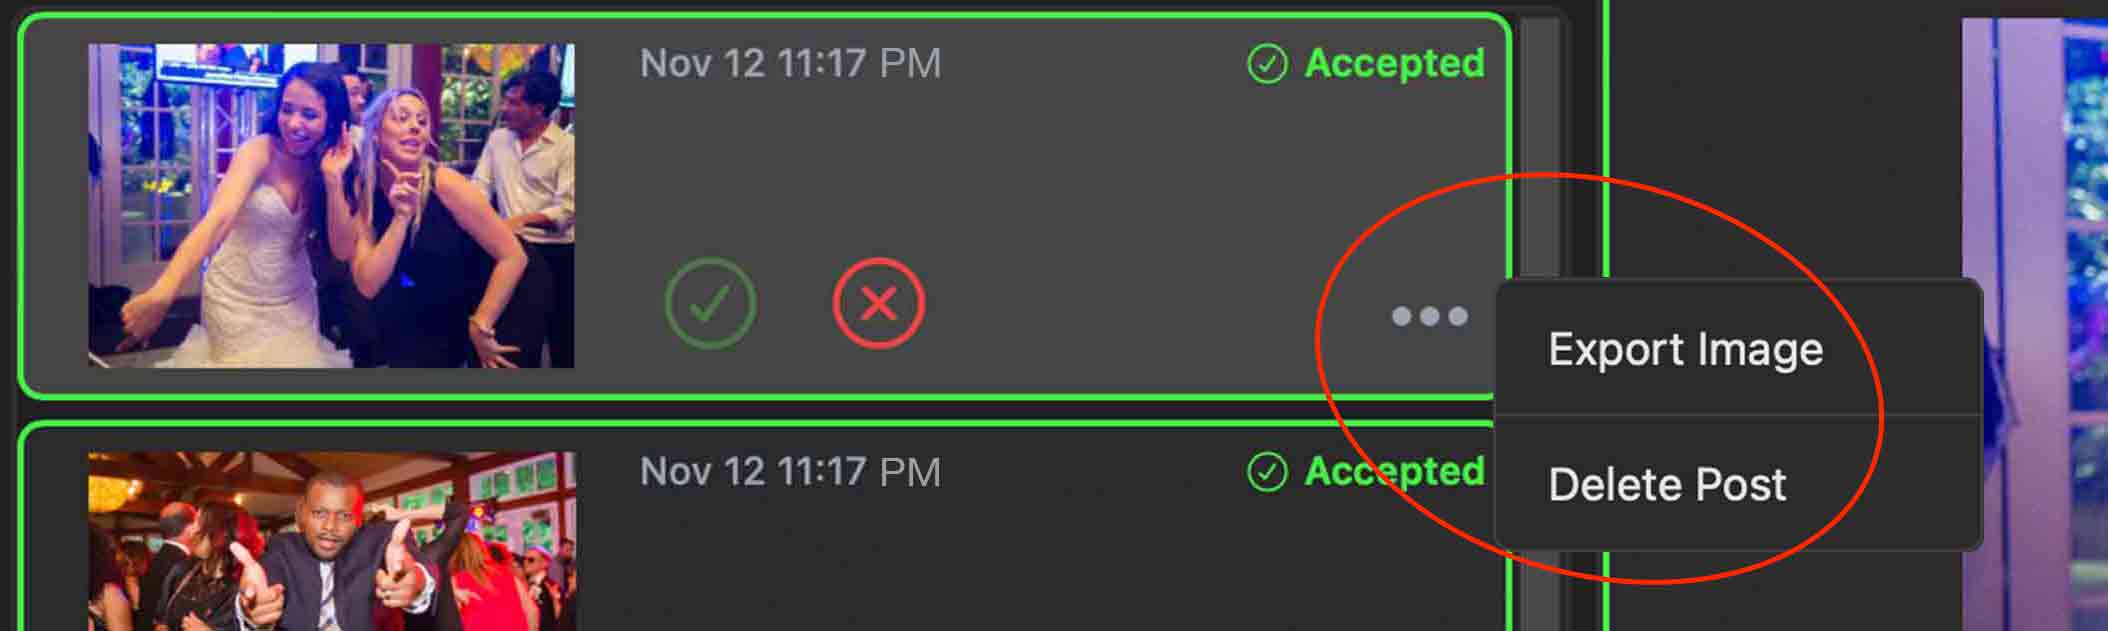
Note: deleting an image cannot be undone, so proceed with caution
When you start an event in Ribalta it will automatically launch the display. However, you can also launch and close the display by clicking the display icon on the upper right corner of the Ribalta app.
After the display window launches, drag it to your second screen, then double click the screen to make it full screen. The display is visible if the icon is green, otherwise it is red.
Note that the Ribalta display will remember which screen number and whether or not it was full screen the last time the display was run. By default, Ribalta will attempt to launch the display to the same settings.
Ribalta saves a collection of all media imported into the program. Any media you drag and drop into a Ribalta Event Profile will be stored in the Ribalta Media Storage. You can re-use any pictures and videos by dragging and dropping them from the Media Storage.
Select the Media Storage by clicking the second icon in the upper right corner of Ribalta.
The Media Storage will pop up as its own window. You can then drag items from the Media Storage into the Event Profile of your choice. Simply drag and drop as if you were dragging a new picture from OSX Finder/Windows Explorer.
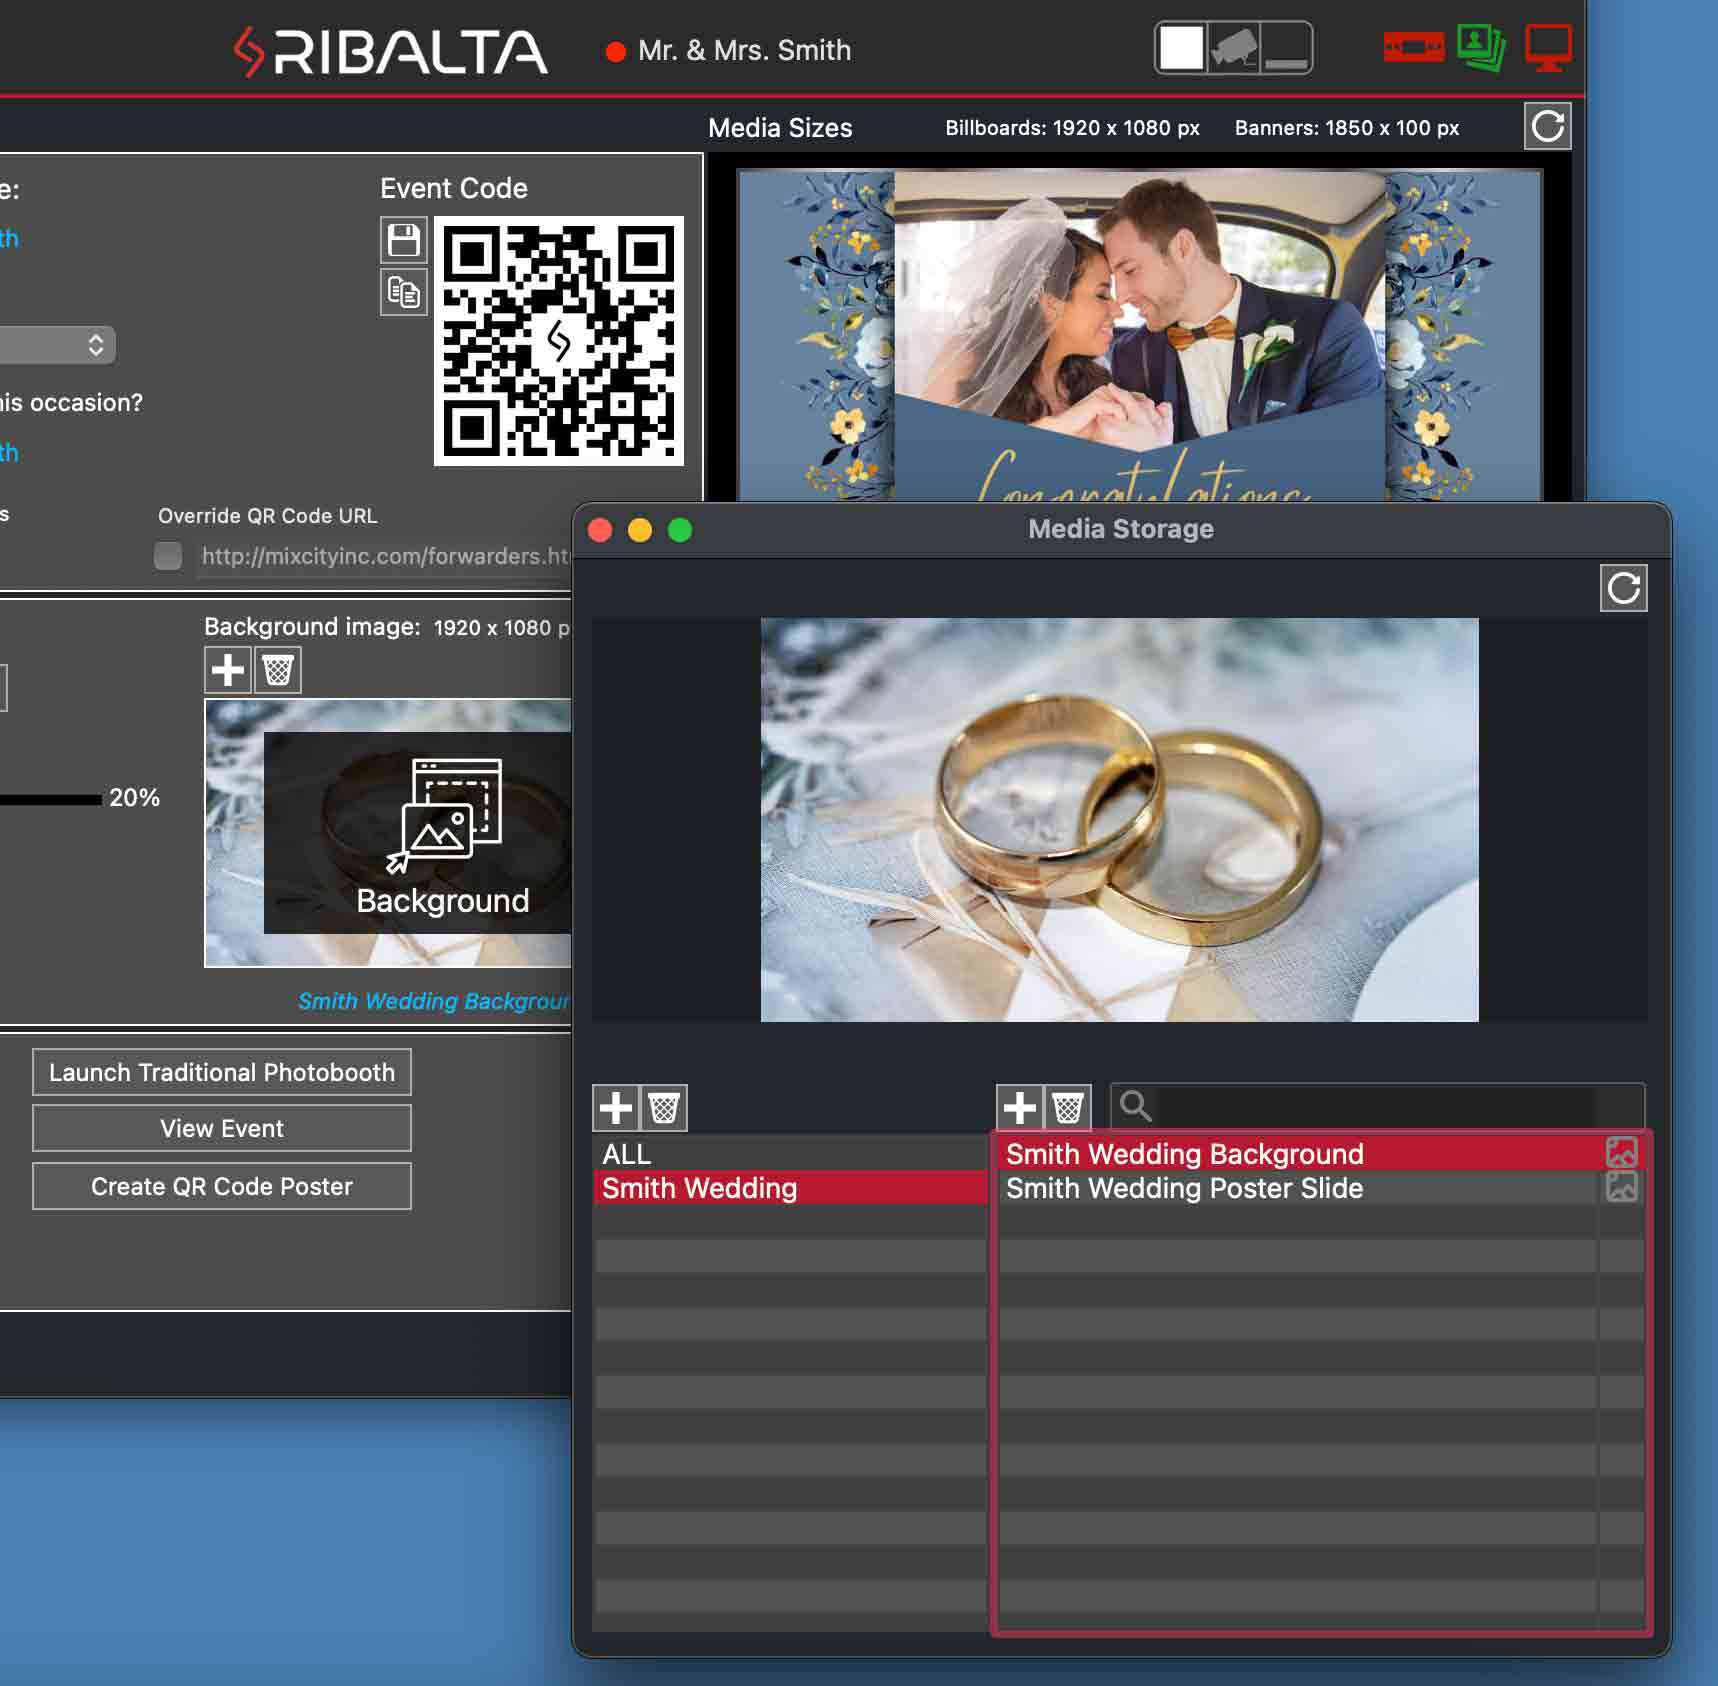
The Media Storage icon will appear green if the Media Storage window is open and red if it is not. Inside the Media Storage you can create new folders and drag and drop to organize your media. You can also add media directly to the Media Storage the same way you can to a Event Profile. You can delete media from the Media Storage as well, which will remove the item from your Ribalta account entirely.
Note that deleting a media item from a Event Profile does not remove it from Ribalta entirely. The item will continue to be saved in the Media Storage. To delete a media item from your account, you must delete it from the Media Storage.
If your media item ever becomes corrupted, you can download it again from the Ribalta servers. Highlight the media item, then click on the refresh button in thew upper right corner of the Media preview display. This will download the item again and refresh the preview display.
Lastly, you can export pictures and video from your Media Storage just as you can with Event Profiles. Select the items you want to export. Then right-click and click on Export. Select the folder you want to export to. Ribalta will open up this folder and copy your media items into it.
Ribalta has its own internal notification system. Notifications inform you of key things about Ribalta and your account such as a new version to download or Media Storage usage. You will see a notification count next to the notification icon, both in the toolbar and in the control window.
Click on the bell shaped notification icon in either the toolbar or control window to navigate to and read your notifications.

Ribalta does not display annoying pop-ups for non-critical messages; informational messages are sent through the notification system.
To access the settings page, click on the last icon on the upper left corner of the main Ribalta app.
Here you can change many settings for the Ribalta display, message filtering, and more. We explain each of these below.
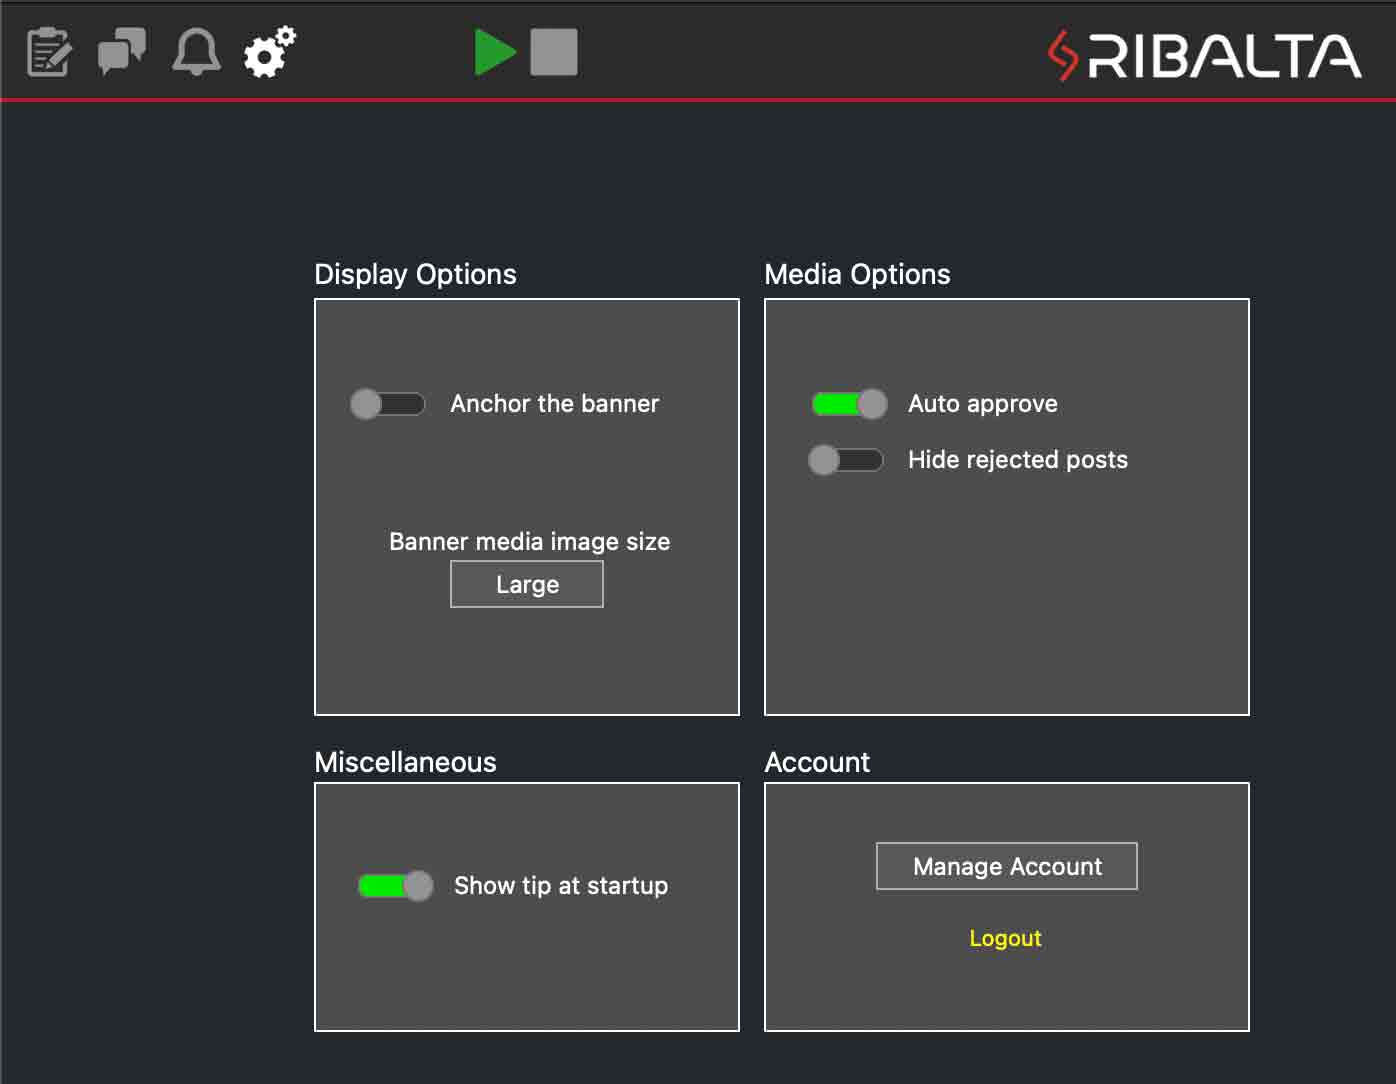
There are two different view options for banner mode. Anchor the banner is on by default. If you turn this option off, your banner will float over the video.
Click the toggle under Display Options to change the Anchor the banner setting.
Choose Large, Medium or Small for the size of the picture messages in banner mode.
There are several things you can do from the pulldown menu.
Click on File → Logout in the pulldown menu to log out of the current user's account. Ribalta will close. To log in as another user, launch Ribalta again, and you will be prompted to log in.
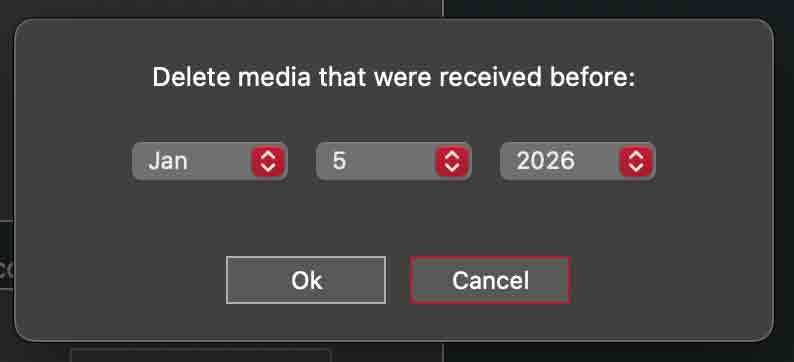
You can reduce the amount of disk space Ribalta is using by deleting old media. Click on File → Delete Old Media in the pulldown menu. Ribalta will prompt you for a date (1 month ago by default). Click Ok to delete all pictures received before the date.
You can move the Ribalta window or the control window to the center of the screen. This can be useful if you are working with multiple screens, as sometimes if a screen is unplugged, programs will move to another screen in unintended ways. Click on Window → Center Main Window or Window → Center Control Window in the pulldown menu to move these windows to the center of the screen.
You can send feedback on Ribalta, including information on any errors you have encountered with our bug reporting tool. Click on Help → Send Bug Report in the pulldown menu. This will launch a pop-up window. In the text box, enter comments and information about your errors. The more detailed the better. Then press Send Bug Report. The bug report system was implemented to help us identify and fix any errors that arise overtime. New OS & Hardware updates can cause unintended consequences within software. However we assure you that we are always working to improve on the already powerful Ribalta software that is available today. The feedback you provide helps us complete that goal.
The Ribalta display app shows the output that will be seen by your audience. (Media wall) This section will outline how to set up your display to show Ribalta to the public and some of the mechanics of how the Ribalta display works.
Most computers have a way to output video to an external screen. The most common connection is HDMI, but it can be any of the following connection types: HDMI, VGA, DVI, Display Port, Mini HDMI, Micro HDMI or Mini Display Port. Check your computer and display manuals or contact the manufacturer to find out whether the devices are compatible and what cables you will need to connect your devices.
If your computer's output does not match the screen's input, there are many different types of adaptors that can be purchased to connect the two devices. Current generation Mac computers are standardized with USB-C ports that can output to HDMI, Display Port and more by using cable adapters. Some macs may have an HDMI port directly on the computer itself. Most current model PCs have an HDMI output, although most PCs can output video using USB-C and adapters. Its a relatively simple process to connect your computer to a screen.
Most modern TVs and projectors have HDMI inputs. Older TVs and projectors, however, may only include DVI or VGA inputs. You really do not find to many of these TVs still around today. In most cases an HDMI connection is all you will need.
Other related help documentation and videos that may help:
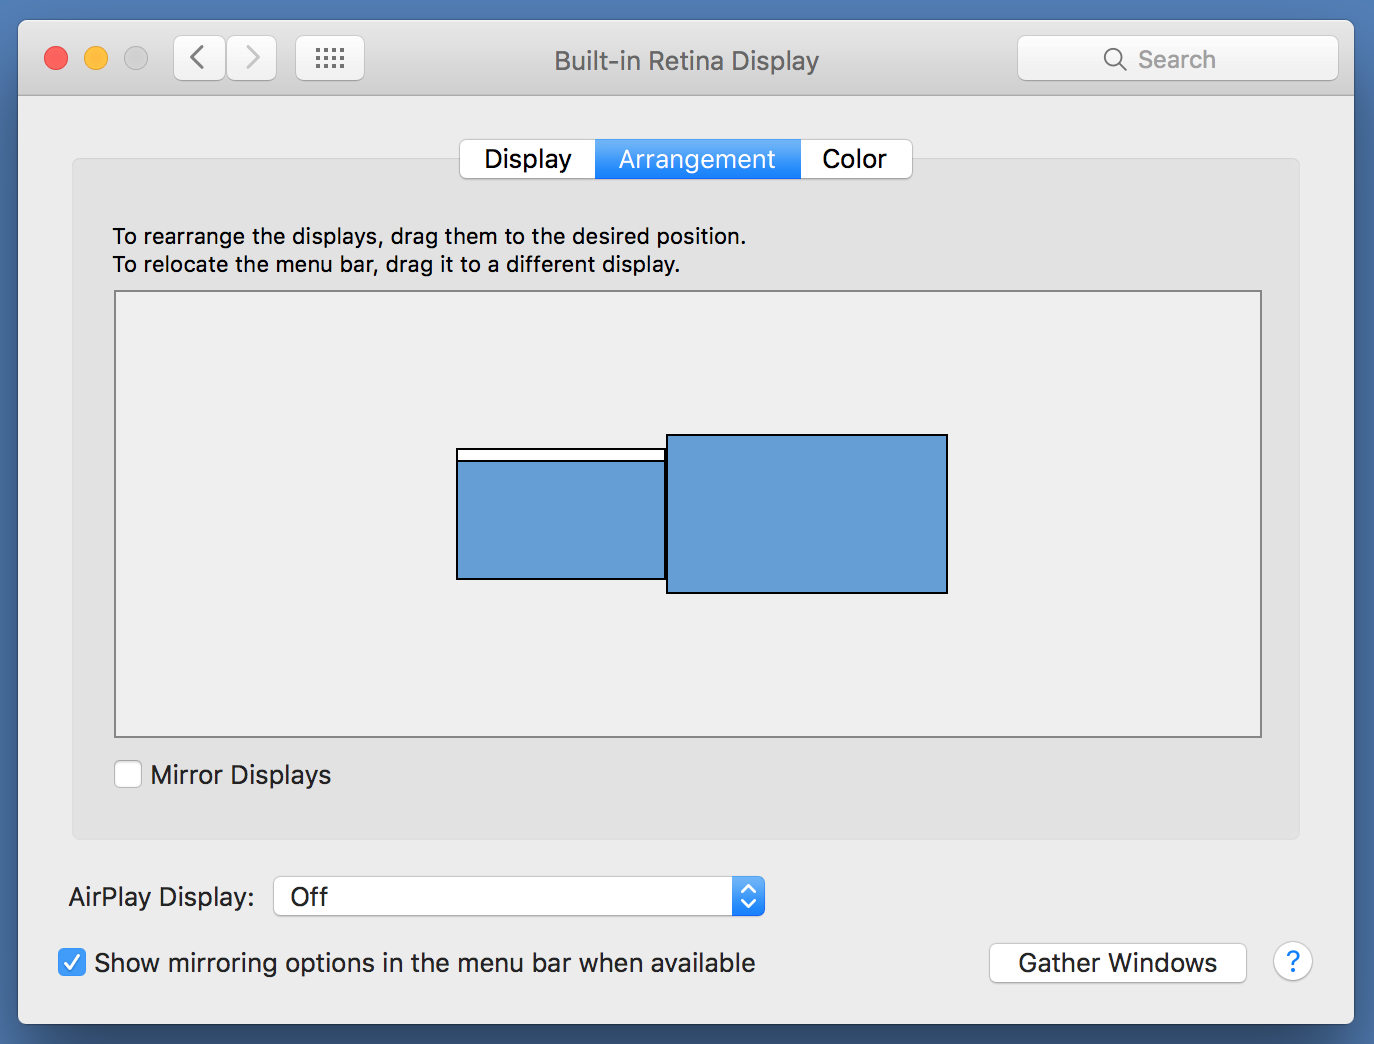
After connecting your equipment, you must set up your second screen as an extension of your desktop. By default, both Mac OSX & Windows mirrors the second display. Mirroring means everything you see on your default computer screen is also shown on your second connected screen. Ribalta will not run correctly in this setting, since the output display must be on a separate screen than the main app. You must change it to extend your desktop.
On Mac, go to System Preferences → Displays → Arrangement (see the picture below). Uncheck "Mirror Displays". Here you can also change the arrangement of your second display. Drag the second display to the location that you desire. For example, you can move the second display down. This will change where you need to move the mouse in order to put the mouse on the second screen. By moving the display down, you can avoid accidentally moving the mouse or dragging items over the output screen if you move the mouse to the left or right.
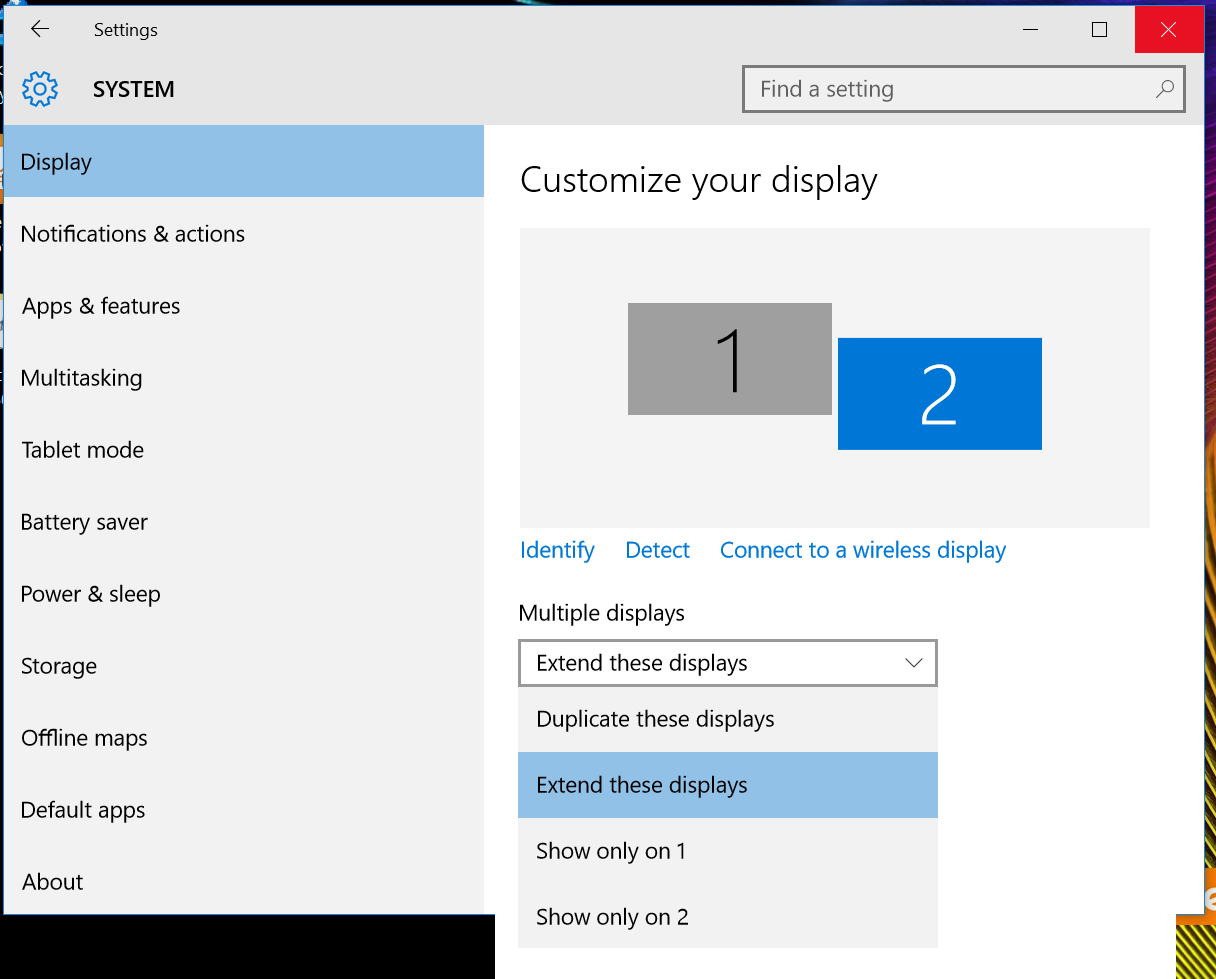
On Windows 10, go to All Settings → System (Display, Notifications, Apps, Power) → Display (see the picture below). Scroll down to Multiple displays and select "Extend these displays" from the pull down menu. If you scroll back to the top in this same section you will see both your displays, marked #1 and #2. Drag the displays to arrange the location of the display. For example, you can move the second display down. This will change where you need to move the mouse in order to put the mouse on the second screen. By moving the display down, you can avoid accidentally moving the mouse or dragging items over the output screen if you move the mouse to the left or right.
Now you have set up your screens. Place the main Ribalta app on the primary screen. This screen always faces you so that you can filter your messages or adjust Ribalta settings. Your second screen should be the display that faces your audience. Drag the Ribalta display app to this second screen and double-click to make it full screen.
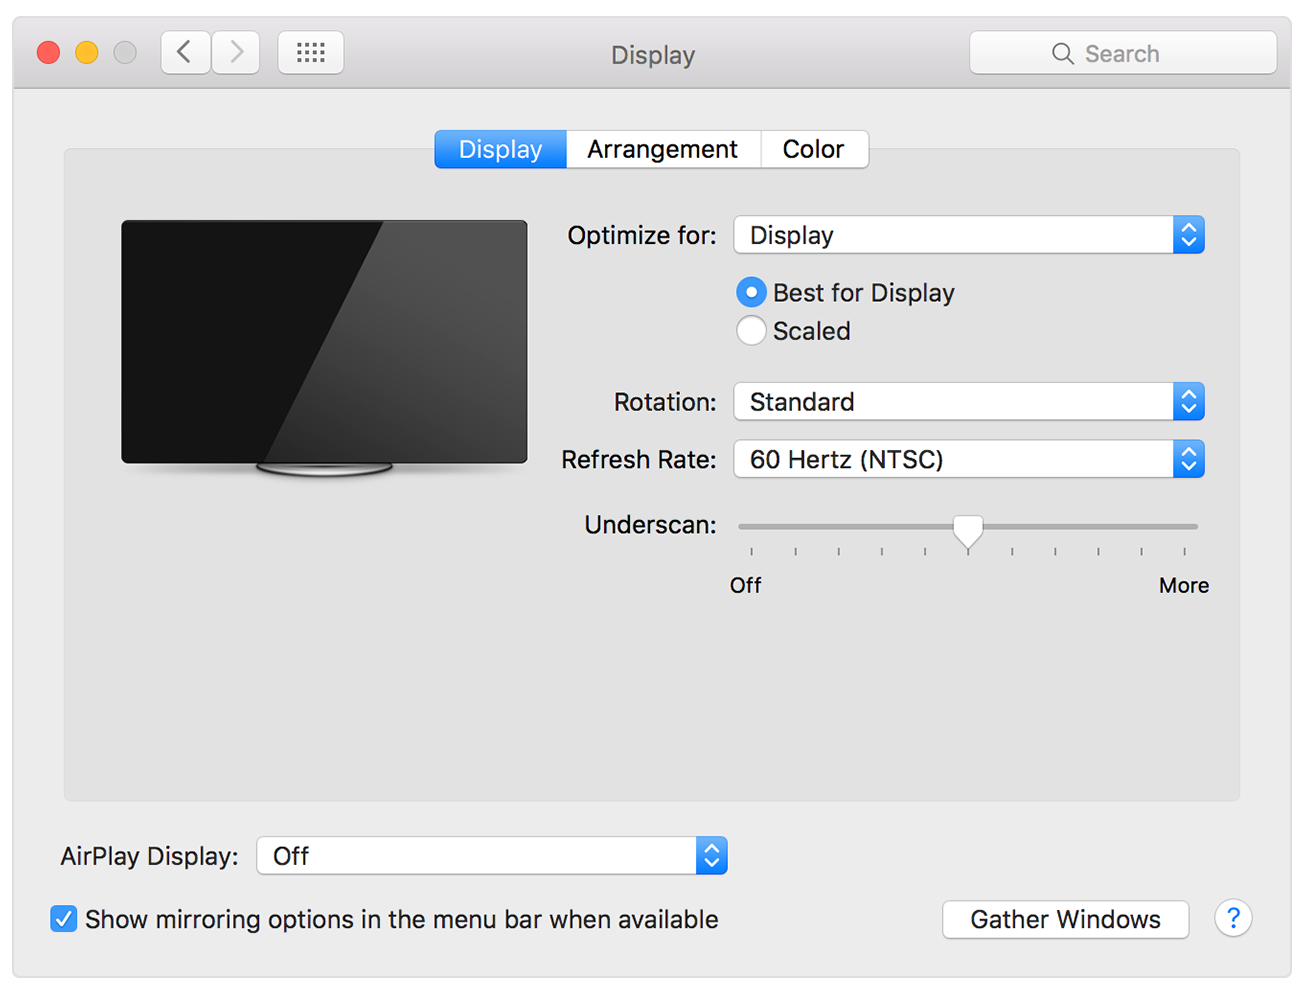
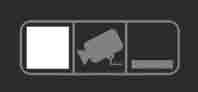
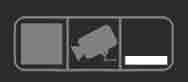
Sometimes the connection between your computer and TV or display may not be translated correctly. This can cause overscan or underscan. Overscan is when some of your TV image gets cropped off the screen; underscan is when the image does not cover the entire TV screen. See the below pic from Apple for a visual.

To fix overscan on Mac: Go to System Preferences, then Display. A pop up window should show up on every display you have connected (see picture below). Click on the Gather Windows button at the bottom of the popup window on your main display to gather all the popup windows. Find the popup window that has the name of your display in the title bar. Adjust the Underscan slider to adjust the display output. The more you slide to the right, the more the display will zoom in. Slide it until your display shows correctly on your TV/monitor output.
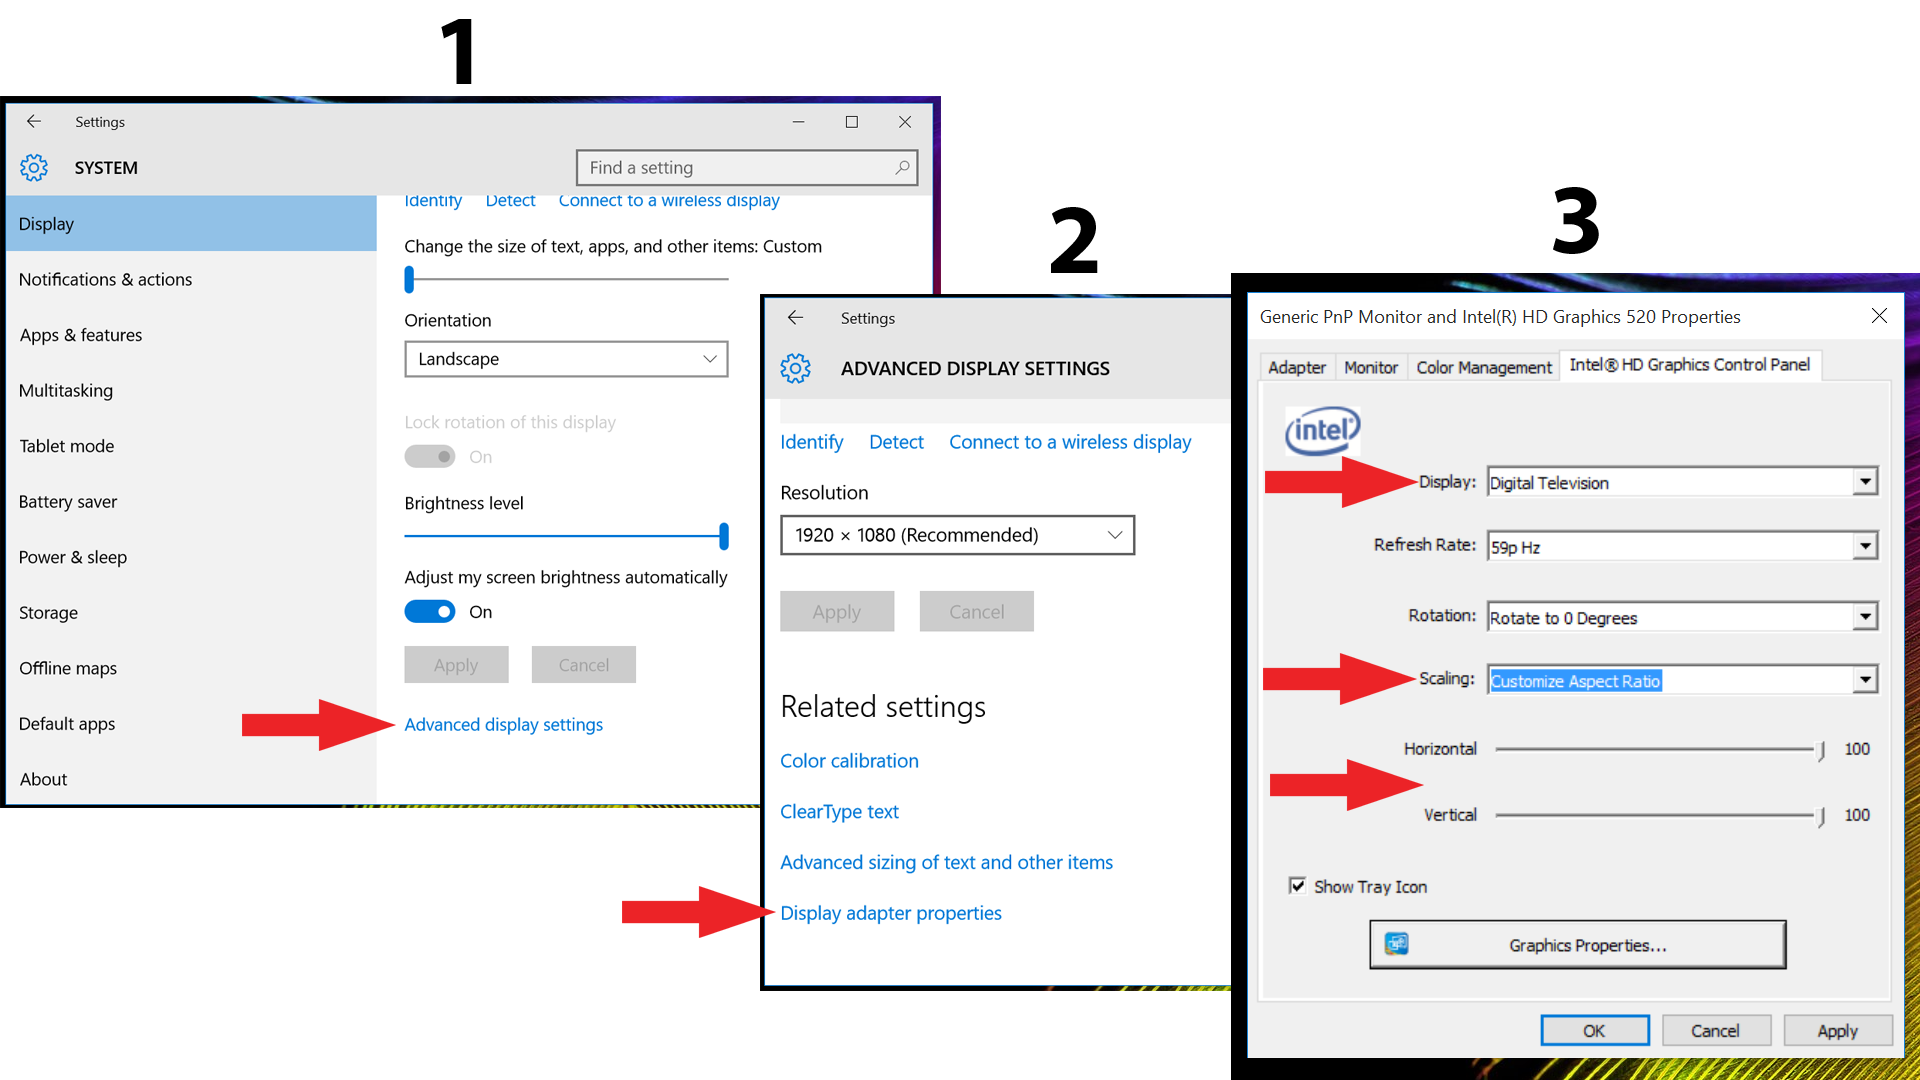
To fix overscan on Windows: Right-click on your Desktop and click on Display settings (see the picture below). Click Display, then scroll down and click on Advanced display settings (this will be a small blue link). On the next screen scroll down to the bottom and click on Display adapter properties. This will bring up your graphics card settings. From here it depends on what your card is. Most Windows laptops come with integrated Intel graphics cards. For these laptops, click on the Intel Graphics Control Panel. Select the second screen under Display, then select Customize Aspect Ratio under Scaling. Slide the horizontal and vertical scrollbars to the left and hit Apply. You can tweak these values to fit the screen exactly. If you have a different video card, consult your video card's documentation.
Ribalta will work seamlessly with most video DJ software, including Serato Video, MixEmergency, and Virtual DJ 8 or newer. Drag your DJ software output to the second screen (the same screen as the Ribalta display). To ensure that Ribalta appears on top of your videos, in your DJ software settings, make sure the video software is not set to always on top. For example, in MixEmergency, go to preferences then click the advanced tab. Then check Lower full screen level. In VirtualDJ, go to settings, then options. Make sure Advanced Options is checked, then go to video, and set videoWindowAlwaysOnTop to NO. Serato Video users do not have to change any settings because Serato video does not have an always on top setting. Ribalta will automatically work correctly with Serato Video.
The most common way to launch the display is to start an event. The display app will automatically be launched when you press play to start your event (see the events section). When you start an event, the Ribalta display will begin displaying default messages and audience instructions (see common display features)
You can also launch or close the display regardless of event status. Toggle the display by clicking on the icon in the upper right corner of the main Ribalta app. If the icon is green the display is launched. If the icon is red the display is closed.
You can also launch/close the display by clicking on the shortcut button in the control window (last button on the right), if you have set this shortcut to toggle the display in settings. See Control Window shortcut in settings
The first time you launch the display, it will open in a window. Drag this window to your second screen and double click on it to make it full screen. Ribalta will remember the position and attempt to launch full screen to the same screen the next time the display is launched. If Ribalta is unable to launch to that screen, it will revert to launching to a window in your primary screen.
Now that we have explained how to run your Ribalta display, let's walk through the display mechanics in the following common features section
The Ribalta display will only show messages and pictures from the event in progress. No messages or pictures from previous events are shown. If you launch the display when an event is not in progress, the display will only show items from the selected Event Profile.
If an event is in progress, Ribalta will display instructions to text your number or email. If texting or email are disabled, the instruction for that form of communication will not be shown.
If you lose Internet connection during an event, the Ribalta display will act as if there is no event in progress. No messages, pictures, or audience instructions will be shown. This is to avoid audience confusion and frustration. If people in the audience see instructions to text the screen and send messages, they will be frustrated when nothing is shown on screen (because the Internet connection is down). Once your Internet connection is restored, Ribalta will resume displaying pictures and messages from the event as well as instructions.
The Ribalta display has three modes.
Entering full screen mode: Click the icon on the left in the group of 3 icons at the top of Ribalta. This will put Ribalta in full screen mode. Alternatively, if you run Ribalta in a window, the content inside the window will be the same as full screen mode.
What you see in full screen mode: Ribalta will display in full screen your event QR Code with instructions to your guest to scan the code to participate. The Ribalta media wall will also show guest content sent from the people at your event. You also have the ability to add your own custom visuals that will appear in between the guest content & instructional billboards. Recent pictures are shown more often, while older content appears less frequently. The logic is designed to keep your display looking current and promotes interactivity.
Ribalta shows billboards from your Event Profile, including full screen billboard images and any videos. Images are shown for 5 seconds at a time, while videos show for the full duration of the video. As long as there is more than 1 billboard, the billboards will show a few at a time, in the order they appear in the Event Profile. If the same Event Profile item appears twice consecutively, it will show for double the time instead of displaying twice in a row.If there are no billboards in the selected Event Profile, Ribalta will only show guest content & instructions on the screen.
Ribalta will try to display more recent content as much as possible. As new guest content come in, they receive the highest priority. Ribalta will show up to 4 pictures (guest content) in a row before moving on to other content.
Entering banner mode: Click the icon on the right in the group of 3 icons at the top of Ribalta. This will set the display to banner mode. Move the Ribalta display app to the screen you want to place the banner on, then double click it to make it full screen. Wait a few seconds. Ribalta will transition into the banner overlay and remain there.
Be sure to adjust your video DJ software settings to disable always on top settings (see Adjusting video DJ software) if you are using Ribalta with video DJ software.
Message banner. Messages and pictures are shown here. The message is shown in the banner. Longer messages will scroll. Above the banner, a gray overlay shows the sender, the time of the message and the number or email used. If the message has a picture, the picture appears as another overlay above the banner.
Instructional banner. Ribalta instructs the audience to text or email.
Event Profile banner. Ribalta shows banners from your Event Profile. These images are held on screen for 5 seconds each.
If there are no banners in the selected Event Profile, Ribalta will attempt to keep showing instructional banners and messages. You may see a default banner in some situations, for example when you transition to a banner from full screen mode. If there are at least two banners in the selected Event Profile, Ribalta will not display any default banners.
Generally, Ribalta will rotate through a Event Profile banner, instructional banner, and a message. Similar to full screen mode, Ribalta will try to display more recent content as much as possible. New messages have the highest priority and are shown before any other message. Ribalta will show up to 10 new messages in a row before showing other content. After all new messages are shown, Ribalta will rotate through recent messages (approved in the last 5 minutes). Recent messages will display up to 10 times. Lastly, if there are no recent messages, Ribalta will display older messages, but it will do so with less frequency. This keeps your display looking current and promotes interaction.
Note that because only one line of text can be shown at a time, messages may take longer to appear in banner mode. If you are being overwhelmed with messages, it may make sense to switch to full screen mode temporarily to show the messages, then return to banner mode when the surge has dampened.
In detection mode, Ribalta will scan your screen for moving video content. If a video is detected, the display will use the banner overlay. If no video is detected, the display will use the full screen. This feature is intended for video DJs who may want to mix in MP3s or other audio content. Ribalta keeps your display interesting at all times with full screen content.
Be sure to adjust your video DJ software settings to disable always on top settings (see Adjusting video DJ software).
Click the middle icon in the group of 3 icons at the top of Ribalta. This will set the display to detection mode. Move the Ribalta display app to the screen you want to use, then double click it to make it full screen. Ribalta will begin detecting video. You must launch the display into the full screen for detection to work correctly; detection will not work if Ribalta is running inside a window.
Video detection comes with a few limitations. The most important limitation is because Ribalta is detecting motion, you cannot use a moving logo in your video DJ software. We recommend using static logos either in the video DJ software or as a banner or slide within Ribalta.
Secondly, videos with very little motion may not be recognized as video. There are relatively few of these. Although the Ribalta display (which will transition into full screen mode) will look seamless to your audience, if you want to ensure Ribalta remains in the overlay banner, you can manually set banner mode for these videos, then return to detection mode after playing the video.
Lastly, transitions happen quicker from banner to full screen than vice versa. This is by design. When a video is done playing, Ribalta switches to full screen mode immediately to avoid showing a blank screen. However, if Ribalta is in full screen mode and has detected video, it will hold the current screen up to 10 seconds so that the audience can finish reading what was on the screen before returning to the overlay banner. This are bad sentence.
![]()